Yet another installment in “How crazy is Syonyk? This crazy!” This week, I’m talking about an exceedingly excessive amount of maintenance and repair to more or less “zero-time” a Microsoft Natural 4000 keyboard from the early 2000s. Dismantle, wash, clean, lubricate, replace palmrests - the works. And the result? Something absolutely wonderful - what types, for all the world, like a brand new Natural 4000! Or, perhaps, even better!
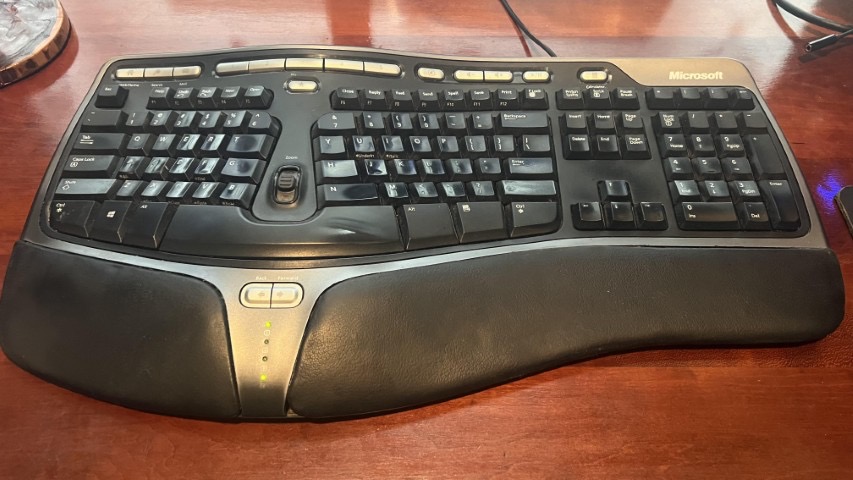
The Microsoft Natural 4000
Say what you will about Microsoft (and lately I’m not saying a lot of nice things), but in the early 2000s, they had a human interface division that was just astoundingly good. The early Microsoft Natural keyboard was followed by the Natural 4000, which has, quite literally, been “the keyboard of my adult life.” I got into the split/arched keyboards back in late high school when working at Micro Center and trying to solve some pesky wrist trouble related to typing. I got a split keyboard and trackball, and the problem went away - so I’ve stuck with it. Sometime in college, I got my first Natural 4000, and this particular one has been a workhorse keyboard ever since. And it shows. The keyboard isn’t particularly clean, and other than some blasts of computer duster spray every few years, I’ve not done a thing to it since I got it beyond use it heavily.
However, the left side palm rest is blistering and tearing, and the keys just aren’t as smooth as they used to be. Some of the wider keys without spreader bars (H, N, T) tend to stick if they’re not nailed squarely on the center of their shaft, and the keys are just heavy in a way that’s not terribly enjoyable to type on. I do like a modern mechanical keyboard, and I’ve still got a legacy Model M rolling around (1990s build date), but this keyboard used to be better - and, it will be better again!
They do come with a very long warning about ergonomics.
I also still have, in active duty, both varieties of Microsoft trackballs of the period. I used to have another Explorer somewhere, and I don’t know what happened to it. They’re not cheap on eBay anymore, though!
Why Clean/Repair?
Why bother cleaning and repairing some old keyboard when I could use the excuse to buy a new one? I just don’t like doing things that way.
There’s no point in throwing out something that works well and, with a bit of time and attention, can be made to work as well or better than new. It saves money, it prevents the production of new eventual e-waste, and as almost all new computer parts are made in China under “questionable to outright horrid” labor conditions, it prevents contributing more than needed to that particular cesspool of toxicity. Yes, I have some very real problems with the state of modern consumer electronics.
But, mostly, it’s because I can. Because I like getting my hands dirty with older equipment and making it work well again. Not much from the late 90s is still useful in terms of computing (even though my dual Pentium III accomplished the same tasks I accomplish today on less than a gigabyte of RAM - bloat is a thing and Electron is a case study), but input devices still are - and they still accomplish the same exact things. I don’t type any faster than USB 1.0 can send keystrokes.
I’ve written more extensively on repair before, though, if you’d like my views on it in longer form.
Getting Inside
For a keyboard, the Natural 4000 is a bit of a puzzle to get inside, with a variety of hidden screws. But, fear not, I’ve got them all documented (and, really, the rest of the internet solved this long before I did - this is just my contribution to the effort).
First, unscrew all the screws from the bottom of the keyboard. But, wait! Did you notice anything weird? Three of the screws are longer than the others. You’ll need to put them back in the correct spots - I hate finding screws in the wrong places. I worked on PowerBook G4s, and those things are fiendishly tricky to get back together if you don’t keep track of where the screws go.
The blue arrows point to the “long” holes. They’re the most outside edge ones in the body of the keyboard, and you might label the holes with a sharpie or something for ease of reassembly.
With all the screws removed (check - there are some slightly hidden ones under a foot, but nothing under labels), the palm rests should work free. They come straight up and out - there are no snaps, but after 20 years, it may feel like it. Just work them gently and they’ll come free.
Now, there are two more screws to remove - these are the “short” variety. Remove them.
But wait, there’s more! The last two screws are under the spacebar - so pry it free. Just get your fingertips under and pry, it’ll pop loose eventually. Try to pry from both sides, if you can - the keyboard is robust, but if you break parts, you’re not going to find replacements. The spacebar should pop loose with the first hint of just how disgusting your keyboard really is. You can see the spreader bar - if you’ve not taken apart a keyboard, almost all “long” keys have this sort of spreader bar. It allows a press anywhere on the key to be equally distributed such that the key goes down evenly, and doesn’t jam. Without this, a press on one side of a long key would cock the key sideways and it wouldn’t depress properly.
Also, last warning. This keyboard has 20 years of gross. Turn back now if you’re squicked out by gross keyboards.
With the spacebar off, you’ll find the two small silver screws that are the last ones holding the keyboard together. Remove them and it’s time to separate the upper and lower keyboard halves! They should come apart without too much trouble - the upper right tends to stick a bit, but if it’s just absolutely not coming apart, check for some screws on the bottom that you’ve missed. There are a few deep wells. It should wiggle apart with no more than the usual amount of hassle for plastic that’s been together for decades. Again, it comes straight up.
Ideally, the halves come apart smoothly and you’re able to look on the springy membrane. Yeah, that’s probably gross too. These domes make the spring of the keyboard, and also have a nub on the bottom that presses the contacts to indicate that a key has been pressed. They peal off easily, and it’s time to start cleaning!
Cleaning the Bottom Half
The silicone sheets should pull right off, and there should be seven of them. Stop up your sink so they don’t end up going down the drain, and just rinse them under water - you can ball them up gently as the water flows over them. It’s a rather neat feeling as all the springs sproing against each other. Just clean them lightly - no need for exotic processes here.
Then, set them somewhere to dry. There’s a lot of drying time involved in this process, and while you can speed it, leaving things overnight is really the best option.
The rest of the keyboard can come apart if needed, but there’s no reason to. Get a can of duster spray or compressed air and just clean out the bottom - you want to ensure there’s no grit between the two layers of the membrane that make contact (the silicone nubs push on the intersections between the two layers to indicate a key has been pressed), but a bit of compressed air should clean everything down here out sufficiently. It doesn’t build up finger oil or anything, just a bit of dust.
Dismantling the Top Half
The next step is hard on fingertips. Remove all the keys you care to clean. This step might be optional - it’s possible you could just soak the whole keyboard in enough water to clean it without having to remove the keys, but given how many places crud builds up, it’s better to remove the keys entirely.
They come out with a combination of wiggling from the top and pushing from the back. The white dust here, as far as I can tell, is simply some worn plastic from heavily used keys on the home row.
Each key has a stem that looks much like this. There are two tabs (left and right on this one) that lock the key in place, and some guide fins that also serve to ensure each key goes back where it should. The keys aren’t really interchangeable on this keyboard from shape reasons, but the stem layout helps make sure that they only fit where they should. If the key just won’t come out, you can use a small screwdriver to push the springy tabs in, but don’t push them too hard - they’re not designed to bend very far, and definitely not designed to bend very often. You’ll find all sorts of nasty stuff under the keys.
If one of the bars pops loose, just pop it back in place.
It’s possible to remove the key plates, but there’s no reason to - you don’t gain anything in terms of making the keys easier to remove or in terms of cleaning the keyboard.
You don’t really have to remove all the keys - it’s probably fine to leave the numeric keypad and such installed, and just rinse them out well. However, for the sake of completeness, I’ve removed all the main interface keys. The stuff along the top I use so infrequently that I couldn’t tell you if it sticks or not (though it doesn’t seem to), but the main key area definitely needed some love. Also, it’s gross under the keys.
No, really, it’s gross. Once you’ve got the keys out, go wash the keyboard top half off, very well. Take it into the shower if you must, or use some water with good pressure to really get the gunk off. Some people suggest the dishwasher for keyboards, but I’ve not found any reason to bother - hot soap and water in the sink seems entirely sufficient to me.
As for the keys, you’ll probably want to let them soak in some hot, soapy water for a while. It really helps break the gunk up. Then, rinse them under water, rubbing the top of each well soaked key with your finger, and it should clean off any weird residue. Let everything dry (this is, ideally, a multiple day project - disassemble and soak, rinse and dry, reassemble). You want everything quite dry when it goes back together.
I’m not aware of any good way to remove the lettering from keys, nor do I suggest it - but, I have to admit, a fully blacked out Microsoft Natural 4000 would look really cool. It would also be virtually impossible to reassemble.
Reassembly and Lubrication
How well do you really know your keyboard layout? Try getting it back together without using a reference photo! Or, just use one of the photos I’ve posted as a reference. The keys stems are keyed in various ways to help prevent you from getting things too wrong, but you could definitely put some keys in the wrong places if you tried.
I’ve gone back and forth on how to best lubricate the keyboard, but after experimenting on another one of mine, I think the best way is to assemble the keyboard, then grease the keyshafts. This should help prevent grease building up top, where it definitely will collect dirt and dust. The process is fairly simple - press a key down fully, apply some grease to the back of the shaft, repeat until done.
I’m using Krytox GPL 205G0. It works fine, though leads to a slightly heavier keypress than stock (but very smooth). For my use cases, I don’t mind it. You might consider something a bit lighter, but nobody seems to actually bother lubricating the older membrane type keyboards, so there are very few reviews of how things feel. One could experiment with a range of greases and oils, or just “get something and be done with it.” As my goal here is to solve the keys binding when being pressed (no, just cleaning it didn’t fix that, and, yes, I did try it), a bit of grease works wonders. You could also, perhaps, just grease the keys that are sticking, but then you’d have inconsistent feel. The greased feel is slightly different, and you get used to it. It also quiets the keyboard down some over stock.
Keyboard grease appears to be the same sort of rabbit hole as “What’s the best material to fill my speaker stands with?” There are an infinite number of options, each with their own supporters, and you can spend a rather impressive amount of time going in circles without actually learning much. Just get something. Just push a key through, apply a thin layer of grease to the stem, and go on your way. Try to hit all four sides - they all slide. You can grease the whole keyboard, or just the “main” part of it - up to you. I didn’t bother with the numeric keypad because it works fine and I just don’t use it that often. For the spacebar (after putting the screws in!), hit the various vertical sliders too. It’ll quiet it down quite a bit from stock.
You should also put some grease on the “spreader bars” - just where they slide, and maybe right at where they pivot. You may have noticed some grease on them when you took them off - put some back!
Reassemble if your wrist rests are in good shape, and go on your way!
Repairing the Wrist Rests
One of the other problems on my keyboard is that the material on the wrist rest is bubbling and has broken. It doesn’t feel good to type on. Fortunately, you can easily get the material to repair these - you want “self adhesive leather patch” from eBay or somewhere similar. The handrests are just some foam under the fake leather sort of material. However, if you need to do this part, do it last. The new stuff doesn’t stick as well as the old stuff, and it’s far easier to wrap the palm rest, and then be able to immediately insert it in the keyboard to hold everything in place.
Removing the old material shouldn’t be too hard - just be careful not to take chunks of the foam rubber with it. Start at an edge and work across. If it’s pulling the foam rubber too much, try from another angle. I had no trouble getting both sets off. I could have left the right side, but then the colors would be all weird…
This is what you get - two aged foam rubber bits in plastic, and some coverings.
Trace your coverings on the new material (ensuring that if you’ve got the new material upside down, your old covering is upside down too), cut them out, and apply them!
To install the new material, just lay the wrist pad down on it, more or less centered, and start working it around. Without some super extra adhesive, it’s unlikely that the sides will grip like the old stuff - but it doesn’t really matter either. Just do this part last, wrap the new material around, and then slide it into the keyboard. The rest of the frame will hold everything in place.
The corners of mine didn’t end up quite as nice as from the factory, but I don’t really care that much - they’re functional, and are a lot nicer looking than random blisters forming on the material! If you wanted a factory finish, you might use some rubber cement to help the adhesive stick to the plastic, and perhaps a hair dryer or some other warm air source to help the material bend around the corners more smoothly.
You’re Done!
At this point, you’re pretty much done! Test it, reassemble, and go on your way! One nicely restored Microsoft Natural 4000!
Unless, of course, the keyboard decides to be needy and certain key chords don’t work right. If that’s the case, it’s probably just some dust between the layers of the membrane. Take the keyboard apart, and blow compressed air between the layers. If the keyboard has been sitting for a few days open, or you got some dust in it when cleaning, that will make the layers quite unhappy. There are three layers - a top layer, a center “spacer” layer with holes, and the bottom layer. Just blow air around between them and see if you can free up whatever is causing the issue. I was able to resolve it easily enough and, as far as I can tell, everything works!
Should You Do This?
I can’t answer that question for you. I’ve done it to two different Natural 4000 keyboards, so obviously I think it’s worth the effort to get a keyboard I absolutely love working smoothly again. The result is smooth, more damped than stock, quieter, and quite consistent across all the keys. It doesn’t feel like a good mechanical, but neither does it feel like a cheap membrane keyboard. I’m not sure it’s entirely unique, but none of my other keyboards feel like it, and I’m happy with the results!
You’ll know - if you’ve read this post going “Oh, I wonder how I can do this to mine” - yeah, it’s worth it. If you’ve closed the page halfway through because this strikes you as insanity, well, you’re not reading this anyway! But I really do think restoring older, high quality input hardware is well worth the time.
This is a companion discussion topic for the original entry at https://www.sevarg.net/2022/06/18/rebuilding-a-microsoft-natural-keyboard/