The State Of FDM 3D Printing, according to me

Not the best day for this experiment. Even with the lowest power eyepiece I have the thermal distortion from this already 94 degree day is something else. Not much to be done about that I suppose but wait till it’s much cooler.

Hills about 10 miles away:

And a hilltop only about 2 miles away, and with the sun from behind seems a bit better.

Probably wrapping a rag around this setup would help a bit. Some of the glare and contrast isn’t helped by the light leakage coming in between the eyepiece and camera lens.

I’ve got some more bits of the box lid and latches ready to print and test, but first I have to wait another 6 hours for this piece to finish:

Or should I say 6 hours until I know if that unsupported angled overhang needs a complete redesign…

I got the same printer last year when it was released, but I kept it bone stock so far and haven’t had many troubles besides the bed leveling springs moving substantially with ambient temperature changes. And I’ve got a weird firmware issue where if I change anything via the tune menu, such as the nozzle temperature, both x and y servos clunk hard and everything shifts about 10mm over, so the whole print is ruined. Like it’s said above, it’s best just not to mess with it while it’s running.

I did print a couple accessories, like this color blender and this filament feed wheel, because the color blender added just enough friction to the filament feeder that it caused a couple breaks, but I blame most of that on bargain basement filaments. I bought several kilograms of PLA on black Friday for $10-12/kg. It’s super finicky, like it does not adhere to the bed, or even itself at the recommended settings, but produces some nice results at 20-25C hotter, so I may still use it instead of trashing or recycling the rest of it.

PETG worked great for me the first couple prints, which were phone cases and some motorcycle parts. The only problems I had were my own fault, let’s just say PETG does not print well with PLA settings. PLA+ looks like it’s worth the extra expense. Which brand are you using, @Canem ?

It’s not as cute as the calicat, but I’ve found this temperature tower to be pretty helpful with evaluating a new roll of filament. You modify the gcode to automatically change the temperature every so many layers to test layer adhesion, bridging, and appearance with less wasted time and material.

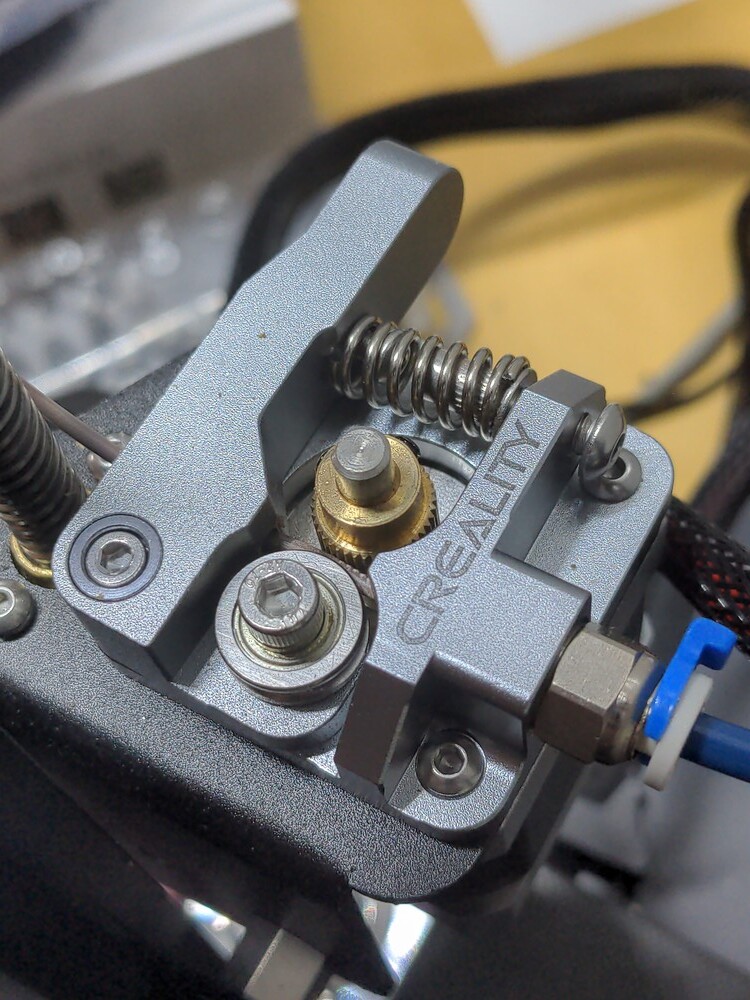
The new springs are worth it and I just installed this thing this week:

I actually bought it with the printer but didn’t get around to installing it yet. Until this week, when the plastic bit holding that tension bearing cracked and started to come loose. Grr…

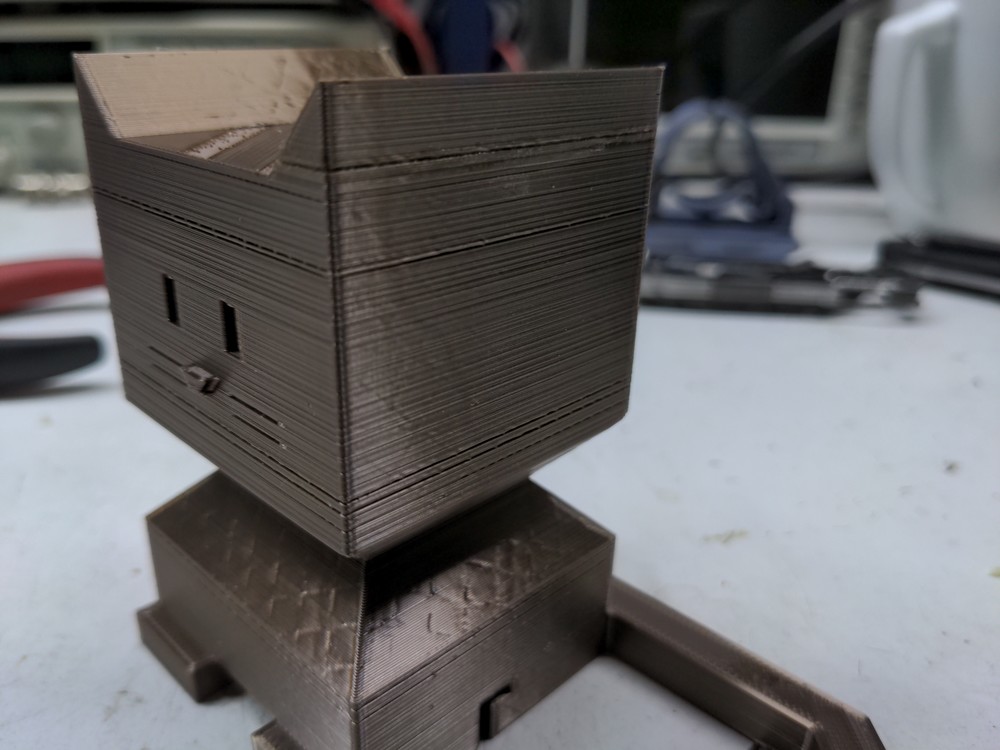
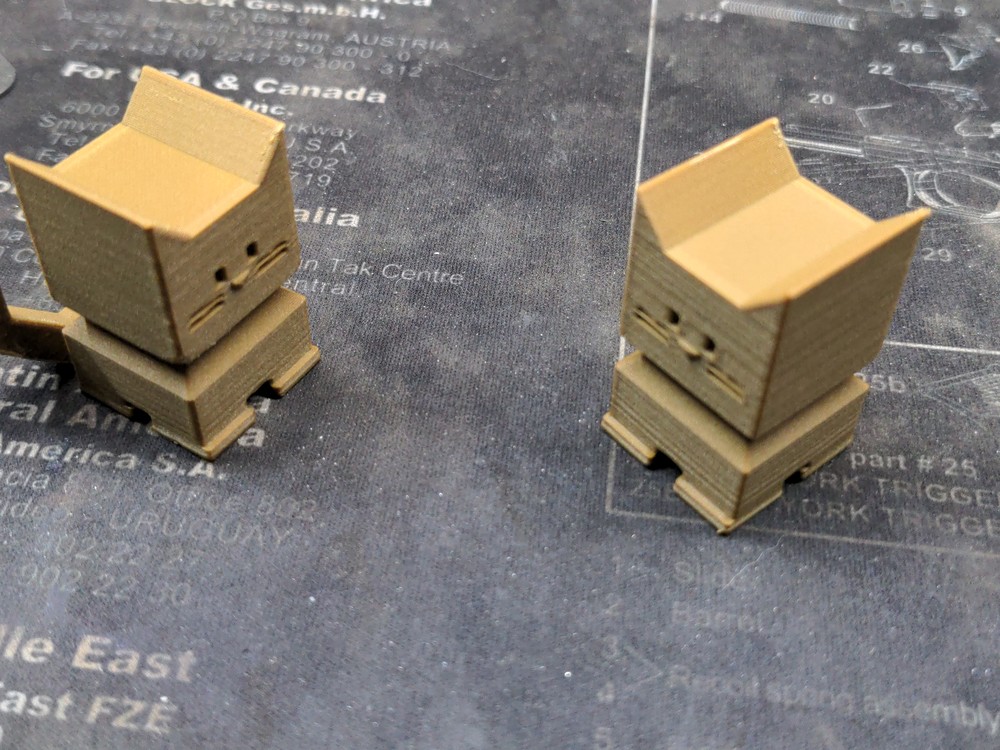
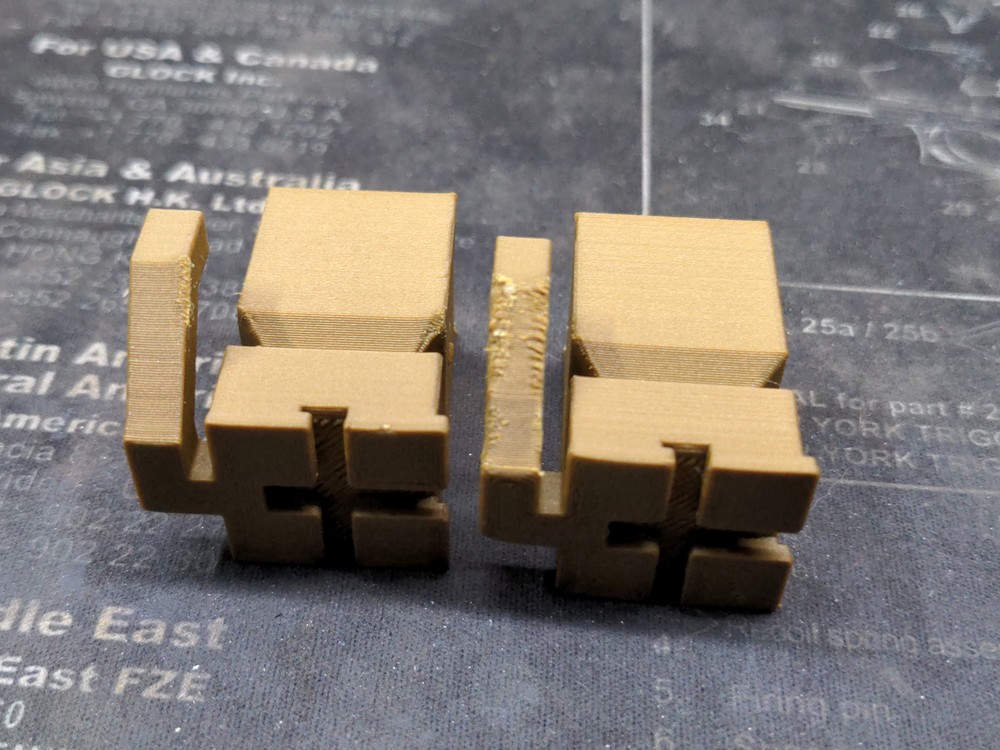
Found that out when I decided to print this giant (and redesigned as phone holder) calicat. Those dark lines are layers that it almost completely skipped. One ear fell off and had to be glued back on. So all metal extruded setup it is.

I thought the upgrades were a good value. I think I paid $20 for a Capricorn bowden tube and connectors, upgraded bed springs, and the all metal feed assembly.

Esun PLA+ as been the absolute easiest ‘it just works’ material I’ve tried so far. Super consistent results, great adhesion, smooth feeding and flowrate. Totally worth the price. It should survive slightly higher service temperatures than regular PLA, although I believe it’s still not ‘hot car in summer’ capable. As far as strength goes though I’d put it up next to PETG from what I’ve tested so far though.

Overture ‘PLA Pro’ is supposedly the same temp and strength ratings as Esun. It works at the same temp settings but must be less dense. I got good results after I cranked the flow rate up to near 115%. Before that there were all sorts of voids and poor layer adhesion and stringing.

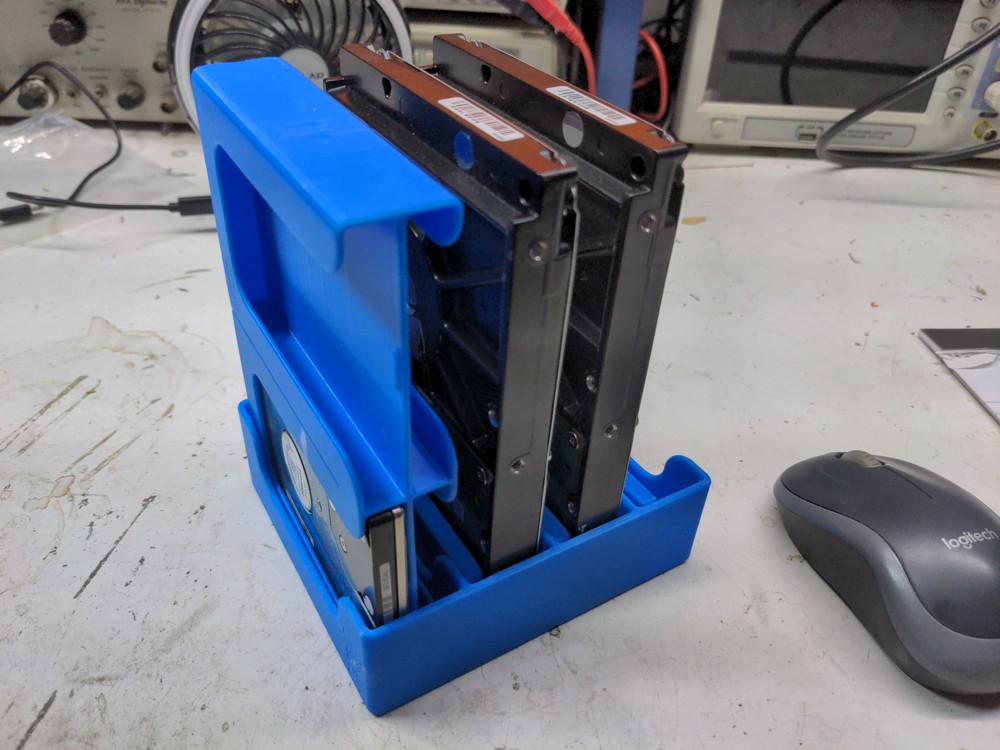
This organizer for some spare HDDs turned out great:

That temperature tower looks very handy. I’ve got some gluesticks to try next with PETG for better bed adhesion, but clearly I also need something like a temperature tower to really dial in the right settings for more consistent results.

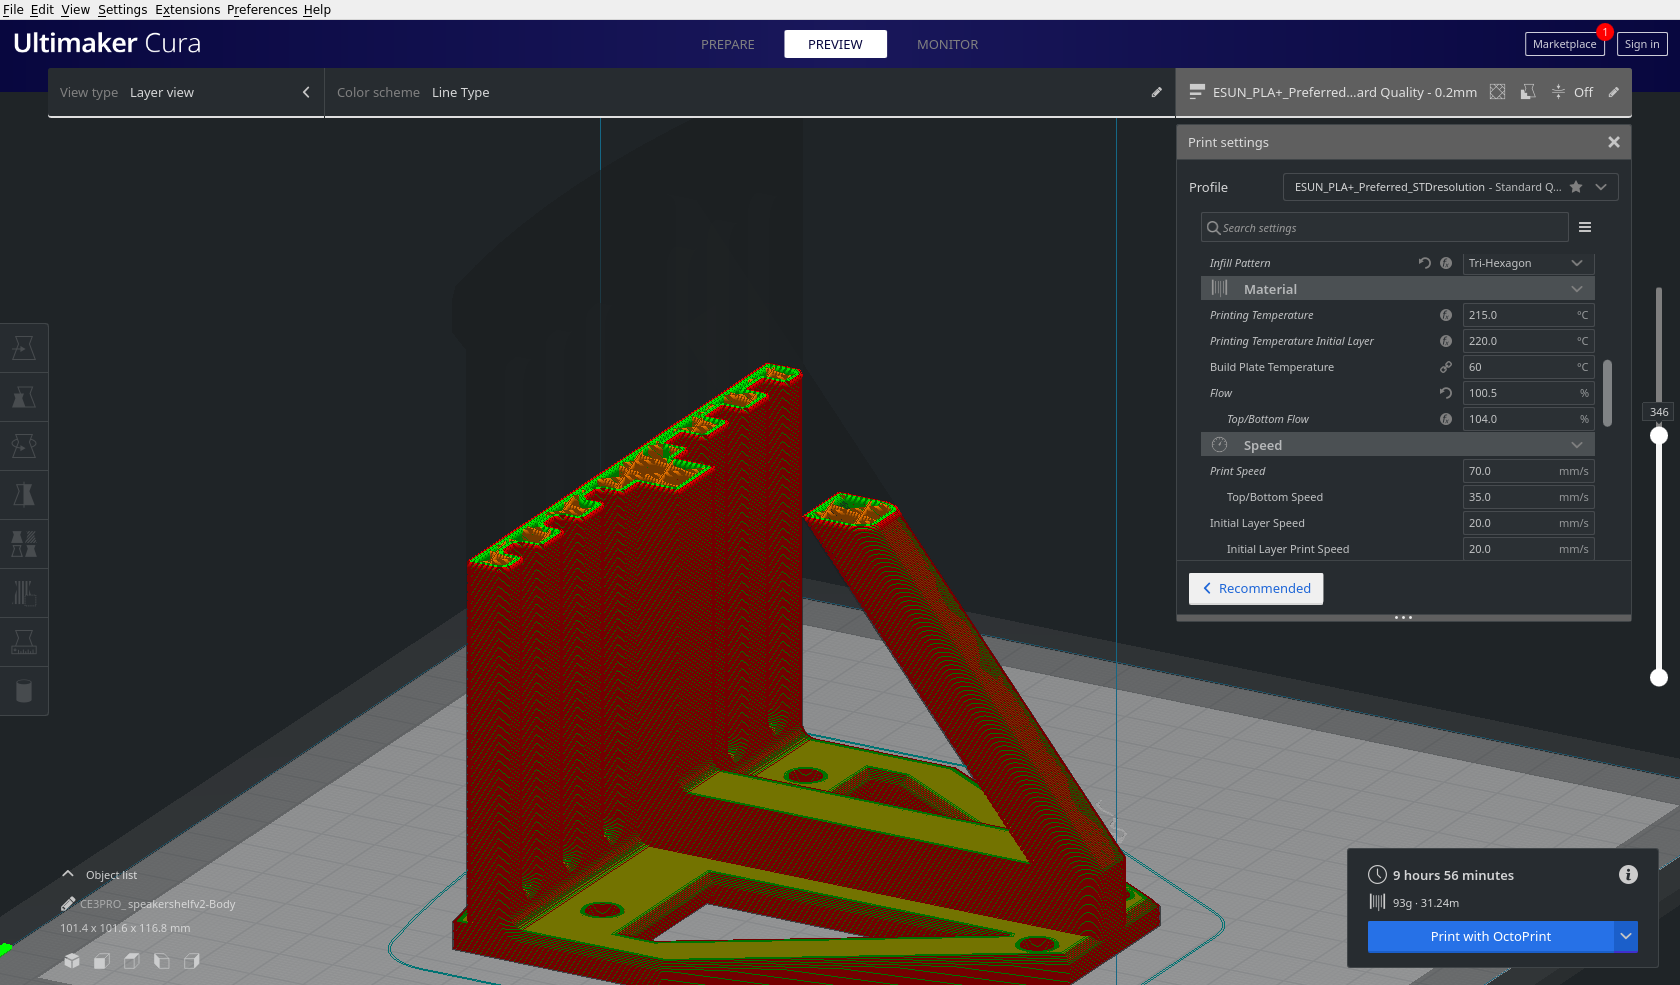
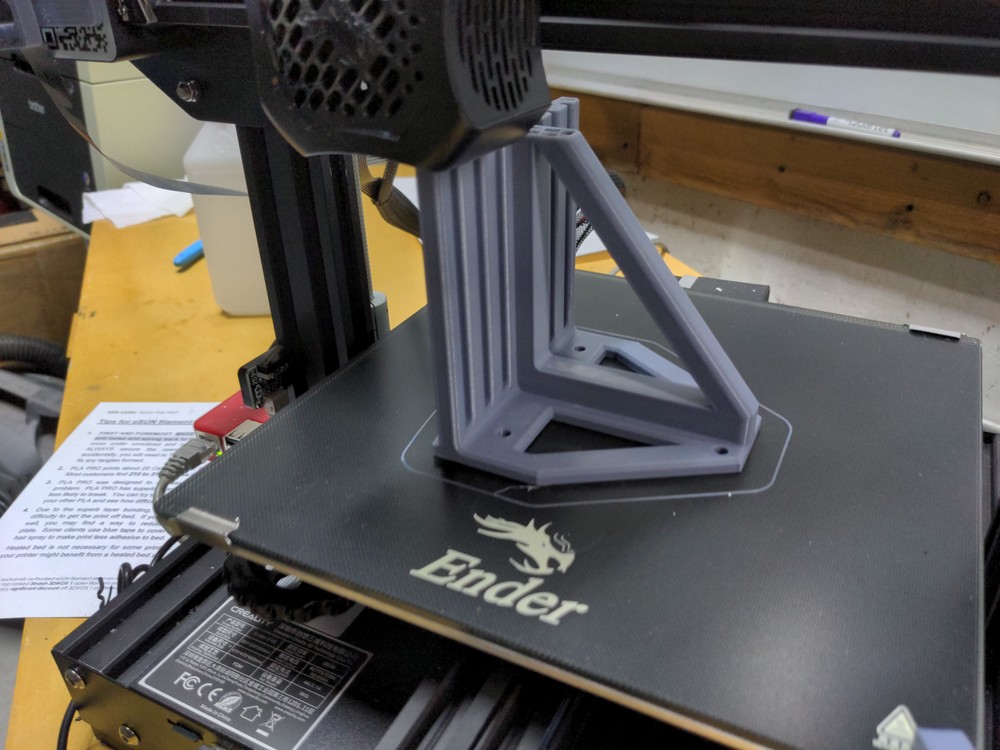
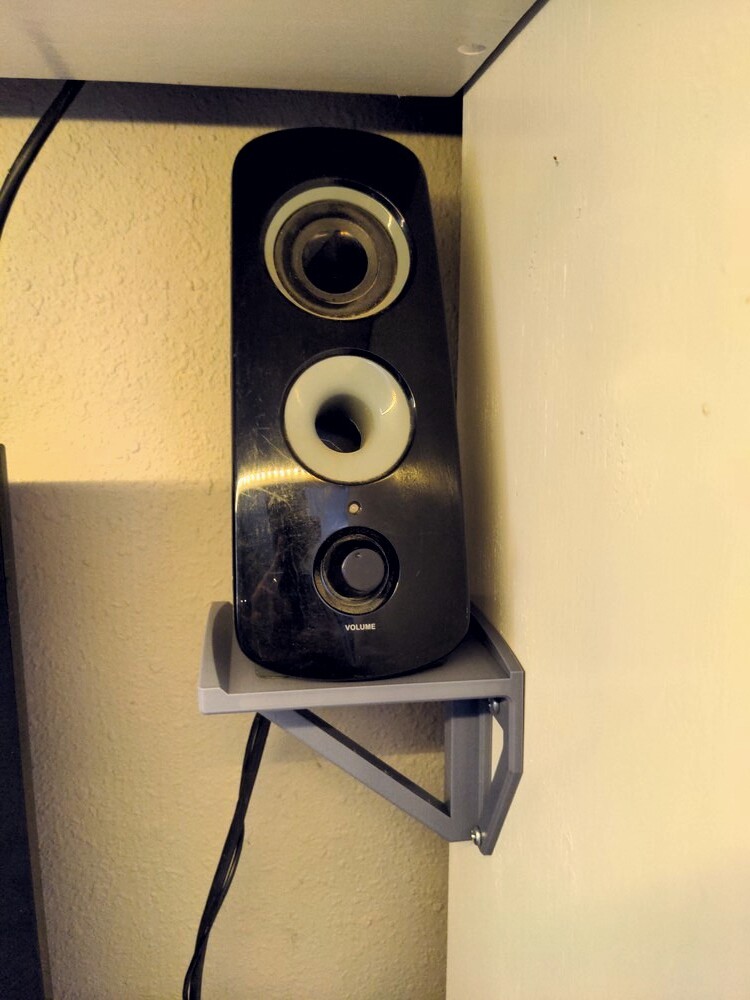
One quick CAD project was a couple wall-mount speaker shelves. I’m really impressed with how that diagonal overhang printed so well without support.

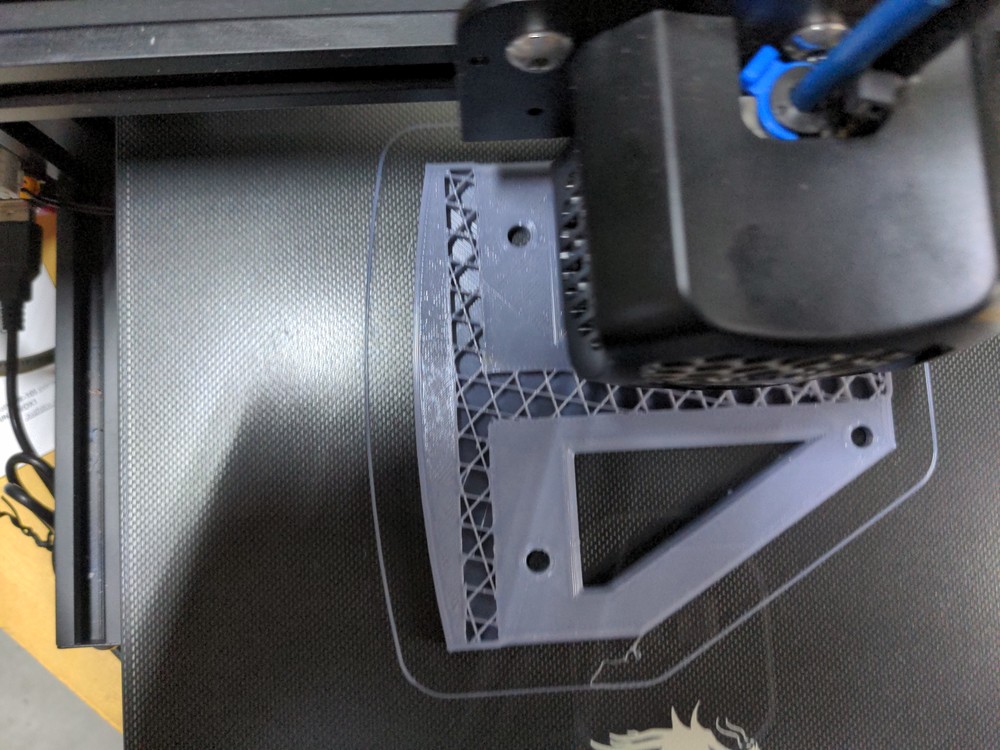
This is just an interesting look at the infill while it was still in the base layers.

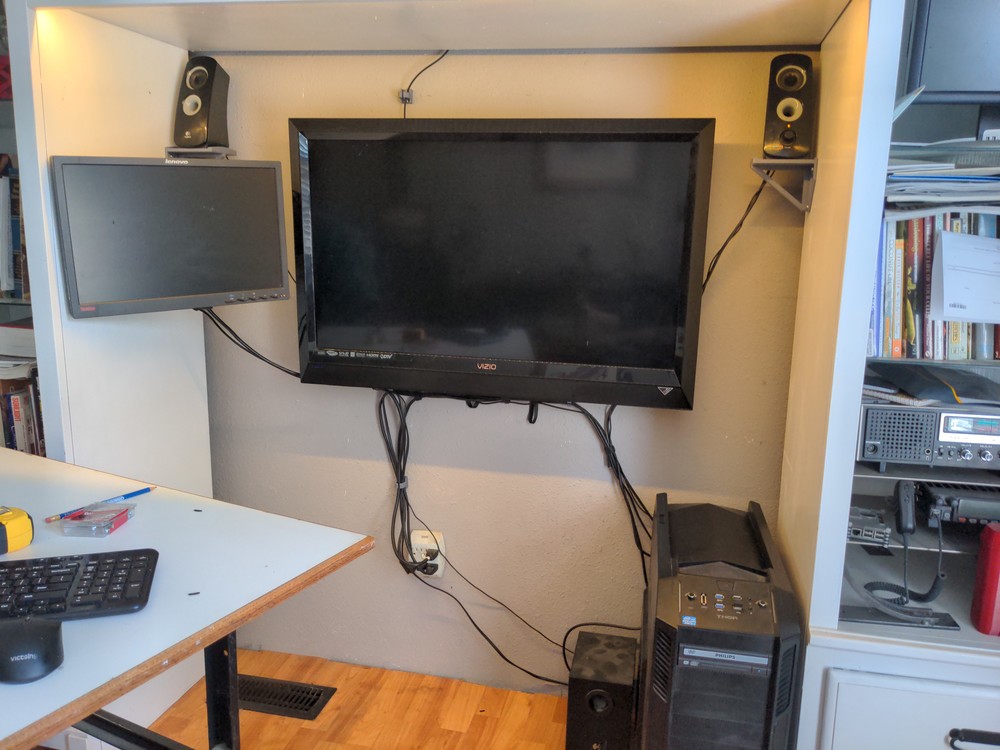
So that got mounted to look like this:

Which I combined with some downloaded cable clips to clean up my living room desk area. It’s not perfect and some of my cables are a bit too short. This is way tidier than it was though.

I’ve got my second test running of that shiny sort of coffee-bronze look like that failed calicat above. The second part of said test is about 3 hours into a 10 hour print, so I’ll have results of how shiny and nice looking that is later if the new tension arm solved my skipping layers problem.

Hey everyone, @Syonyk pointed me this way. I’ve been playing with 3D printers for a few years now, a couple neat findings to share:

  • Ambient temperatures and air drafts can affect print quality a lot, so for PETG, you could try to build a small housing around your printer to help keep the temperature more stable in the build zone.
  • Another alternative is to adjust your slicer to build a “tall wall” around the outside of your part. There are settings in all of the common slicers to do this, and it helps keep temperatures more stable.
  • ABS can be so hard to get working that it’s basically useless in my opinion. You’ll either have small parts with thin brittle walls, or you’ll go for chunkier parts that will split along your layer lines. Unless you can fully control the build zone temperature with some sort of control loop to at least 60C, then I wouldn’t recommend it.
  • ASA solves many of these issues that ABS has, so it’s a great choice. Still smelly though.
  • You will end up using PLA for most prints. It’s just so much less finnicky, and has such great dimensional accuracy, that other materials can never meet. Of course, it can melt at the temps of a hot car interior so… yeah, sometimes you have to deal with the pain of other materials.
  • You can print threads down to M3 in PLA, easy, (they will work great once, but not for rescrewing multiple times, but still a huge timesaver for electronics enclosures and mounts). If you need to rescrew many times, you can get some threaded inserts that you melt into place with a soldering iron.
  • Filament quality does make a difference, MatterHackers.com has good quality and I think their PRO line of filament is US made.
  • If you’re still having trouble adhering to the bed, you’ll want a PEI powder coated sheet. I got an “UltiStik” and it works great on PLA, ASA, and PETG.

Hope that helps!

(A photo of my mobile companion robot with NVIDIA Jetson for running neural nets and trained with reinforcement learning, it’s basically 2 hoverboard motors, some aluminum extrusion, and 3D printed everything else)

Very good to know. I’ll wait till I get an enclosure made, but sounds like I’ll just skip the ABS and go right for ASA (I’m really interested in making some UV resistant outdoor enclosures).

Do you know if the Ender series is up for this as is, or at those temperatures is that the time to be looking at an all metal hotend?

Yeah, ASA seems better than 3D Printed ABS in most ways (the ABS they sell for 3D printing has various additives in it too, so it’s not the same as the injection molding plastic, unless you go for something crazy like the Makerbot Method X).

I’m not familiar with the Ender series, so I can’t say for sure, but I’ve printed ASA just fine on my Ultimaker 2 which is definitely not an all-metal hotend (it has a PTFE heat break).

Update: Below is an ASA housing for a smart electric light switch I was working on. It’s precise enough to clip into a commercial off the shelf ABS “switch” bit, while the housing can be 3D printed and customized.

I don’t feel the hate for ABS … my enclosed CR-6 (basically a fancy self level ender 3) and my old Ender 5 both handled it just fine.

What kind of temps do you run? Any extra help needed for bed adhesion?

I noticed this tension screw appears to be set to a higher tension than my extruder. Is that a difference in the metal extruder or was it just as tense on the plastic one? I just wonder if that’s why mine hasn’t cracked yet after 11 months. I haven’t had any feed issues besides filament breaking before it got to the extruder.

Any idea what this setting is called in Cura? I haven’t been able to find any setting that does what you’re describing. Or maybe I’m misunderstanding. It sounds like it makes a shroud around the project, like a different kind of support, which sounds like it’d use a lot of material, but less than a do over.

The “tall wall” is under Experimental / “Draft Shield” for me in Cura 4.8.

Thanks, I’ll have to try it when I switch back to PETG.

You’re right I do probably have that one cranked up too high. I don’t think the original was that high (I didn’t touch it when I assembled it) until I got this really nice sort of coffee-bronze color silk PLA, and I was having some feed issues because nice as the stuff looks it wasn’t coming off the spool very well and I tried solving the problem with higher tension. Also their threaded-bolt into rivet-nut design is… strange.

Does the job i guess. I’ll back it off a bit next print and see if that continues feeding OK.

Do what you want, your plastic one is already broken and the metal one will most likely hold considerably more tension without breaking. I’ll just make sure to order a metal extruder before fiddling with slippery filaments that require more tension.

Interesting data point: I found a stack of PLA “dixie cups” in storage (inside the house, so no temperature extremes beyond say 85F). I could squeeze the walls together until they touched and it would shatter vertically into strips. I’d guess these cups were over 10 yrs, possibly as much as 15 yrs old.

I’ve had some PLA spools open for a few years. They’ve definitely become brittle with age; if I stop printing the filament will spontaneously snap off after about 2 days, as it bends 90 degrees from the spool to the extruder.

I have a crappy Monoprice mini and it’s about as accurate as a hot glue gun, so I just make holes about the size I want plus 5% (yay openscad) and then drill them out afterwards to make them accurate.

For adhesion I just over-extrude the first two layers so they get smushed down really hard (but squish out to the sides) and clean them up afterwards with an x-acto knife. brute force, but it works for me, as I’m not printing things with any significant accuracy.

I should upgrade, but the low quantity of prints I make (less than one a month) doesn’t justify it at this time.

Nice! I was looking to built an enclosure to hold a relay and an ESP-01 board running ESP Home in a decora “blank” box. I’d be interested to hear more about your project!

If you’re doing your own CAD you can also reduce the squish-out by applying a small chamfer to the bottom of the part.

Ooh, great idea! It’ll also make it easier to pry off the bed by giving me a spot to insert a tool

ABS?

230 hot end, 95 plate. Just the micropore style glass, nothing fancy. Biggest thing is to put down the first layer slow and use an enclosure, it’s pretty sensitive to cold drafts.

Yeah, noticed the PLA getting brittle over time here too. I’ve heard that keeping it in a “dry box” storage, or drying it out in a heated container (oven / food drying machine / PrintDry) will revive its flexibility. It’s especially annoying if you have a Bowden setup, and and shatters into a million pieces inside of the tube :slight_smile:

I’ll make a separate post shortly on some of the projects.

BTW, I discovered this YT channel recently on 3D Printing: https://www.youtube.com/channel/UCMvNnP9oAQl5IApL8XBQIkQ

Very nice engineering breakdown of common printing artifacts and issues with printers.

Alright it’s been too long. Time to re-experiance the thrills and frustrations of dealing with new materials and settings.

How about 3D printing with wood? Well alright, it’s PLA with ~30% sawdust in it. Comes in several colors, is said to be sandable and stainable (but I haven’t tried that yet).

Dialing things in it prints very similar to the Esun PLA+ but is a little harder to stay stuck to the bed. I tried a gluestick and that solved things nicely.

I really like the look of this, and the texture. I don’t think it’s the wood so much as the matte finish of the material, but it makes the layer lines less noticeable.

While watching the first one of these go down i realized something I should try. There’s a cooling fan that vents out the right size of the print head towards the part. This cools the filament as it comes out and helps bridges and overhangs work without sagging. So I did this:


Spot the difference? I printed the cat on the left by facing it the other direction, so the cooling fan was blowing ‘under’ the tail. Not perfect, but it dramatically improved the sagging in the corners you see on the other one. My theory is that when printing the other direction the overhang of the tail is making it’s own wind shadow, and not cooling as well.

There are a variety of designs out there for upgraded dual-duct cooling fan shrouds. I might have to look into those. That and the hot-end cooling fan is one of those super cheap 40mm fans and it is making annoying grumbling noises already. A couple quality fans might be in order too.