Things like screw holes I’ve found tend to, usually, be OK without needing to print supports on the vertical edge. And you can always make a shallow angle support baked into the model (if there’s room for whatever you’re going to use), rather than use a support if you wanted for overhangs.
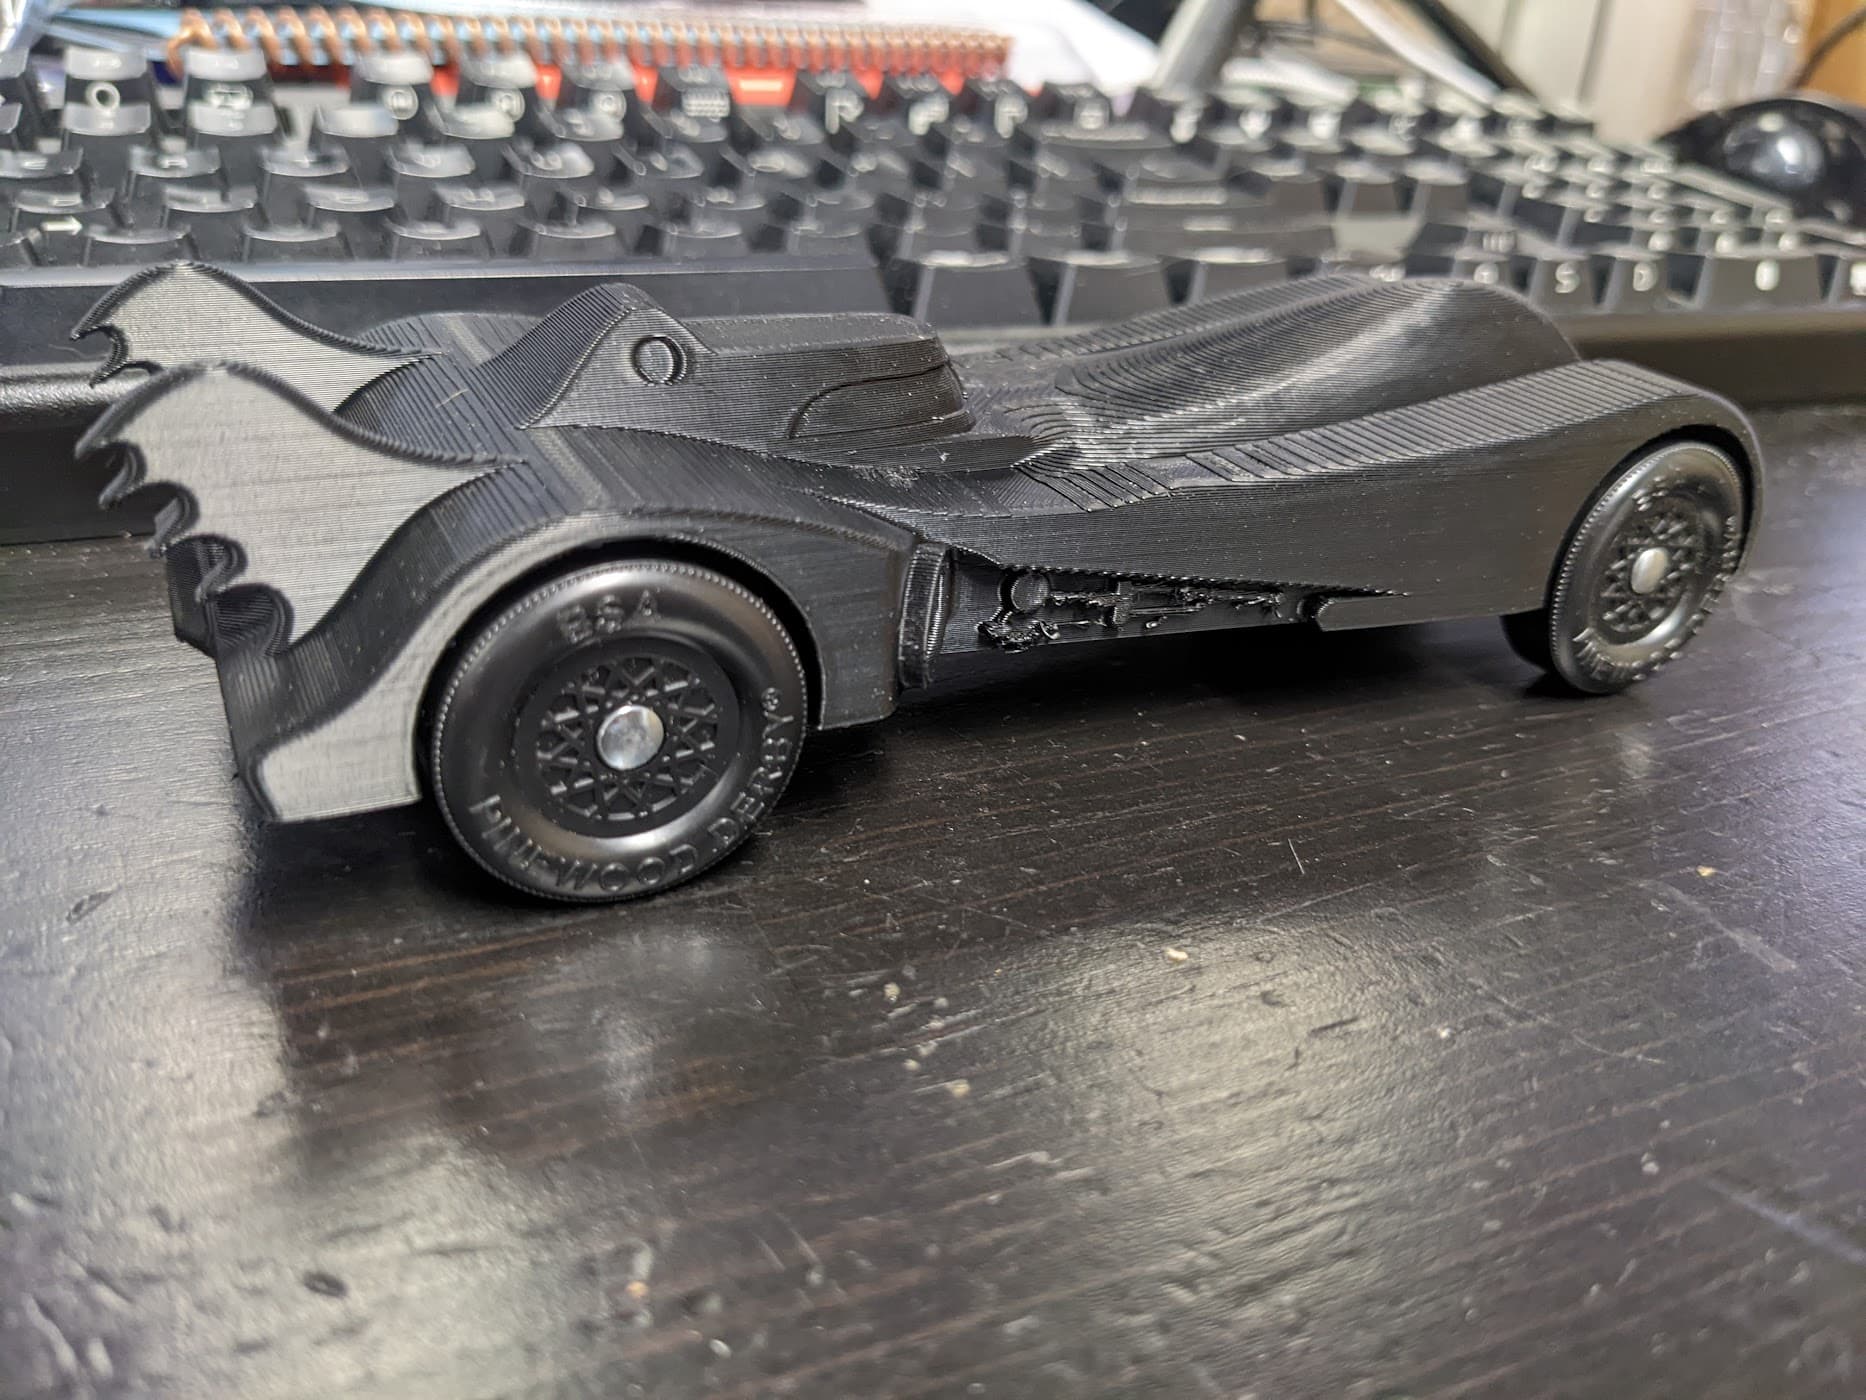
Just a little recreational project since it’s time for our pinewood derby and I had the printer warmed up…
1 Like
I’m glad to see the wheels still are made of hope and suckium. IIRC you’re supposed to mount them on a drill chuck and sand them so they’re actually round?
Haven’t done much lately but run many batches of the same parts through the printers while I do other stuff. I feel like I’ve got PETG working mostly reliable now though.
Mostly…
Send $3.50 in unmarked quarters or the calicat gets it…

Just kidding, he’s fine.
So I’ve started into TPU. It is so darn cool it’s worth the frustration of figuring it out; and man is there a lot of that it seems…
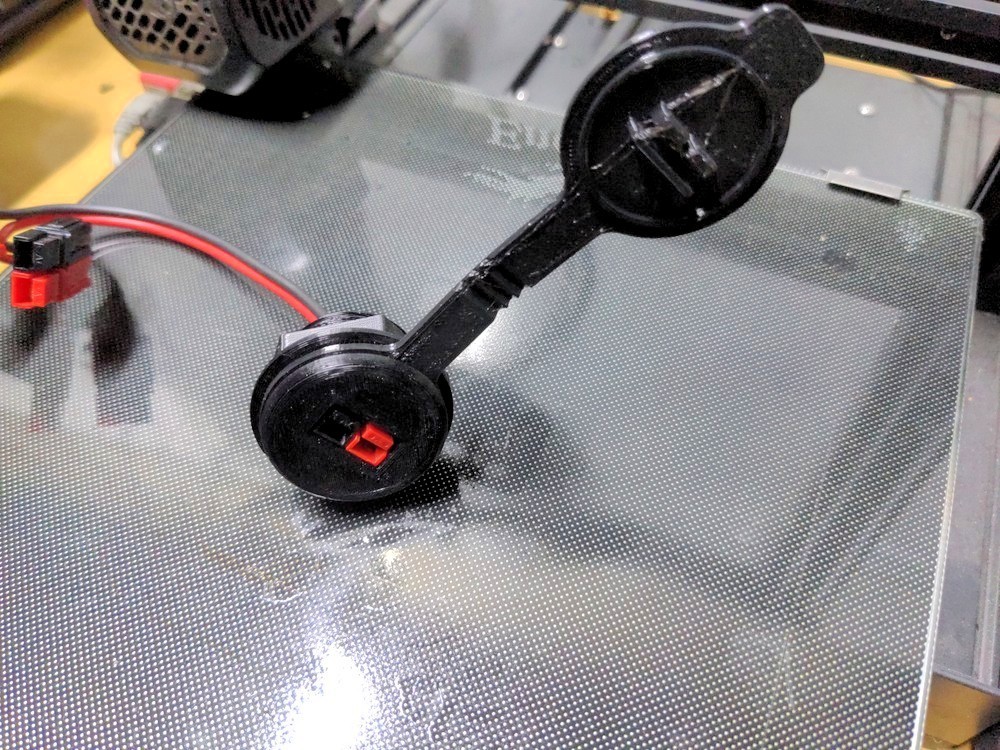
Layer adhesion and strength is amazing. Printing even a thin sheet is extremely difficult to tear by hand, it’s strong stuff. Sure there’s a lot of fussing with settings to try and get the surface finishes better, and the awful stringing. But it’s the extrusion issues that I’m still fighting with. 5 attempted calicats resulted in 2 good ones, 6 rubber bumper parts resulted in 2 good ones, and 4 attempts failed so far at a rubber Anderson Power Pole weatherproofing cover.
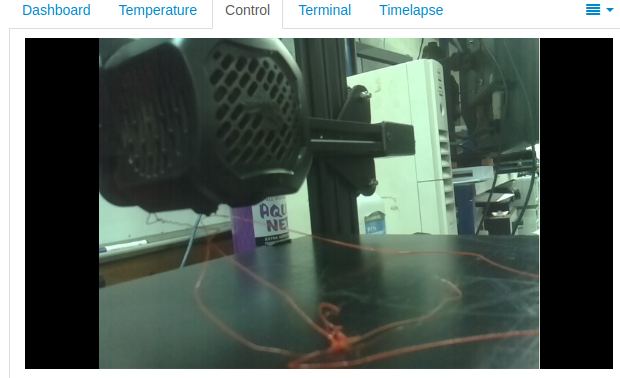
Mostly, I come back to see this:
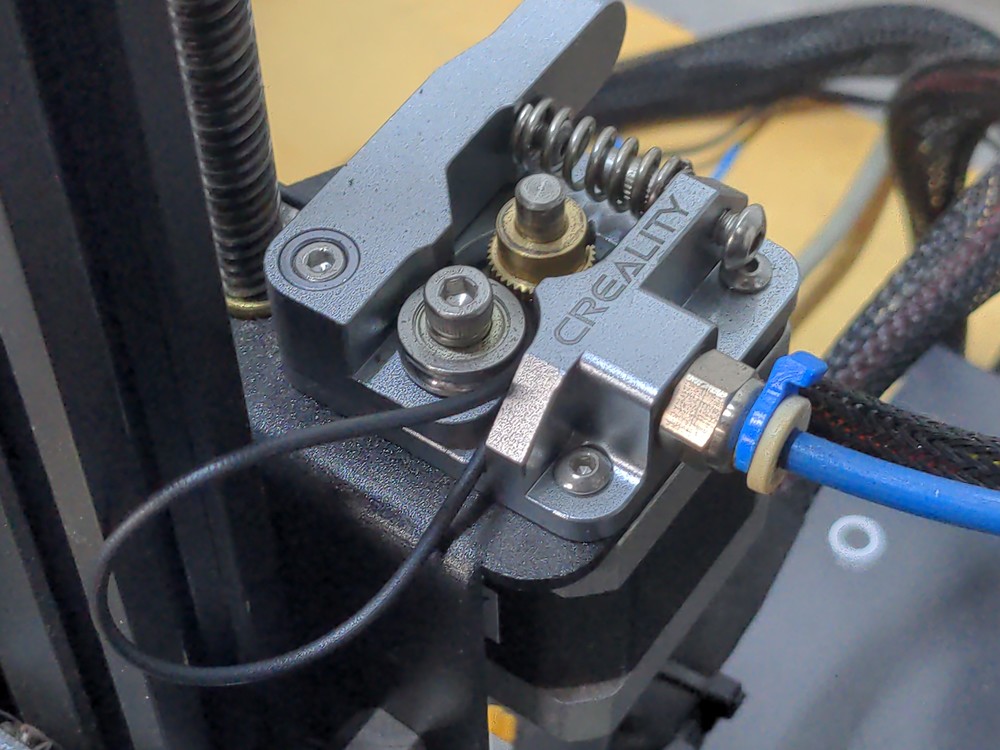
the filament keeps jumping out the gap between the drive wheel and the entrance to the bowden tube. I’ve run the temperature up to clearly too hot just to see if nozzle pressure had anything to do with it. I babysat 2 prints for way to long, hand feeding the spool every so often so it wasn’t pulling from straight above so hard and reducing tension into the extruder.
That also didn’t seem to help, but I’ll keep trying. This material is just too cool not to put up with whatever challenges it’s going to bring.
I wonder if there’s something I could lubricate the bowden tube with, that wouldn’t also contaminate the filament at the nozzle?
Not sure. Maybe reduce the spring tension holding the filament against the extruder wheel? Might be pinching it a bit too much and causing a bulge which with the softer material, cause enough back force to cause it?
Worth a try. I’ll turn that way down and report back what happens.
Adjusted tension, even tried just a bit of silicone to see if lubricating the filament would help. Still no good. So I took the whole feed and hotend assembly apart. Definitely needed a good cleaning, and even the upgraded Capricorn bowden tube was looking rather rough and distorted at the hotend. So I trimmed that back, cleaned everything, and put a new nozzle on.
I think we’re getting somewhere!
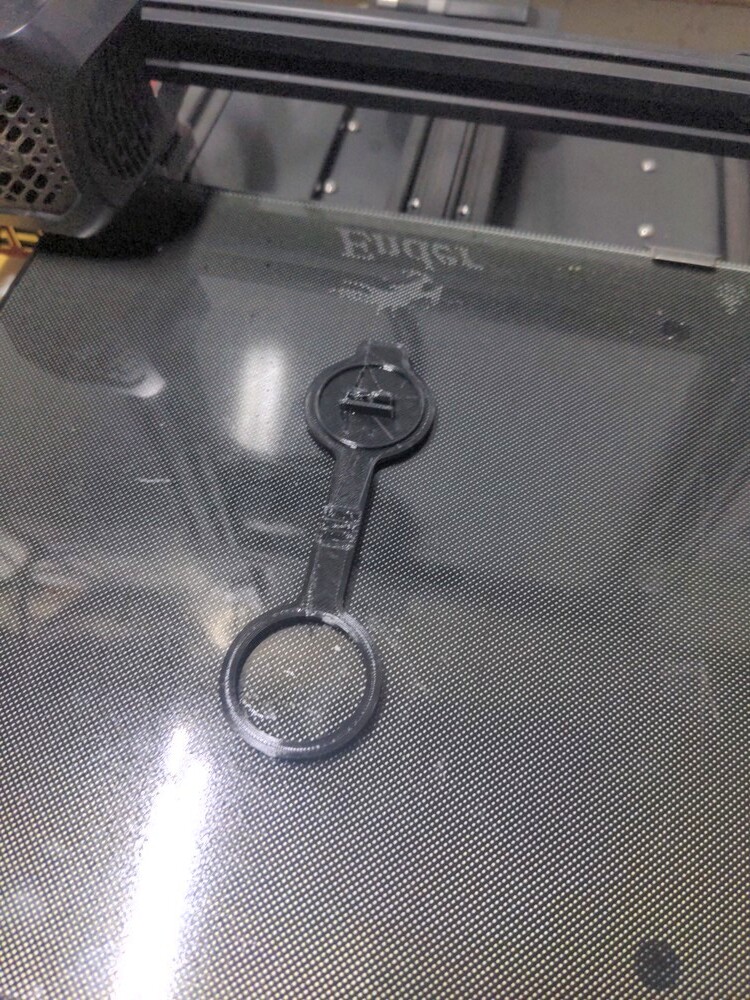
This is actually the 3rd one to print without incident. First two needed dimensions adjusted to work properly but the printed just fine.
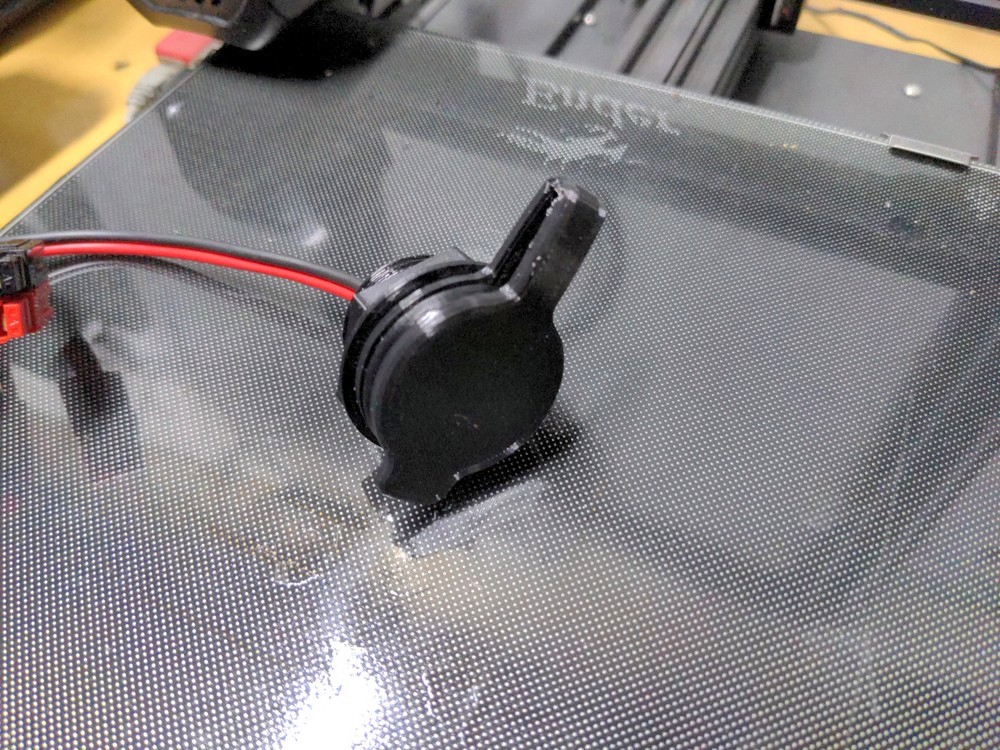
It’s a weatherproofing cap for those Anderson Power Pole bulkhead mounts I printed a while back. Looks like it will work great. Now I just need to make a version for the 2 APP mounts.
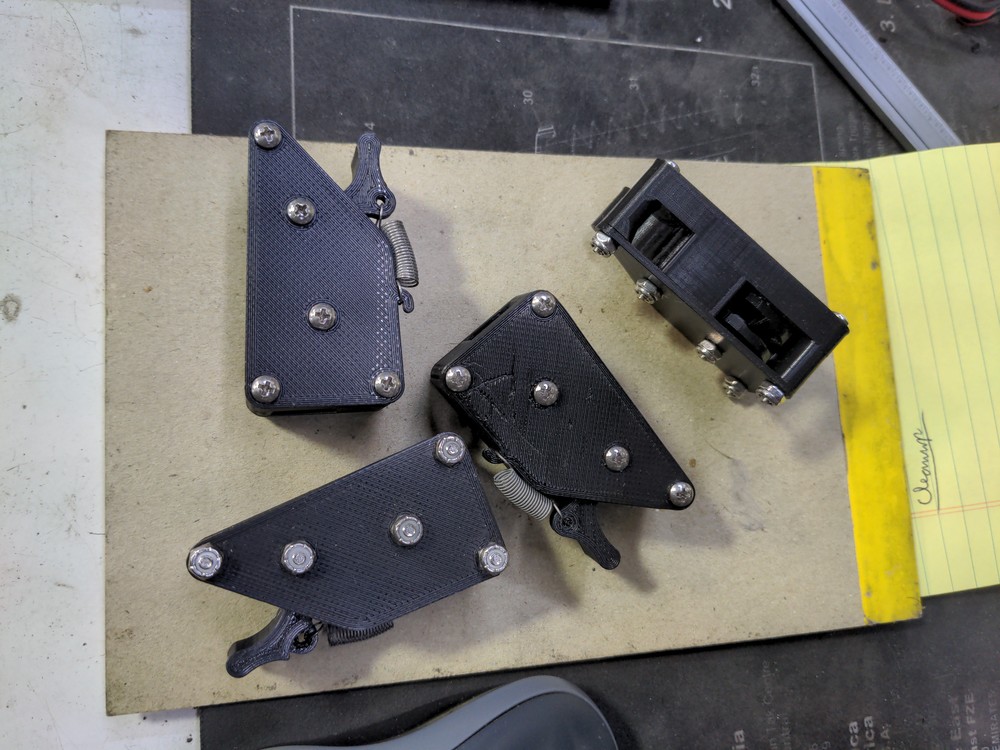
Another example of the awesomely designed stuff you find around online. A ‘Paracord ratchet thing’.
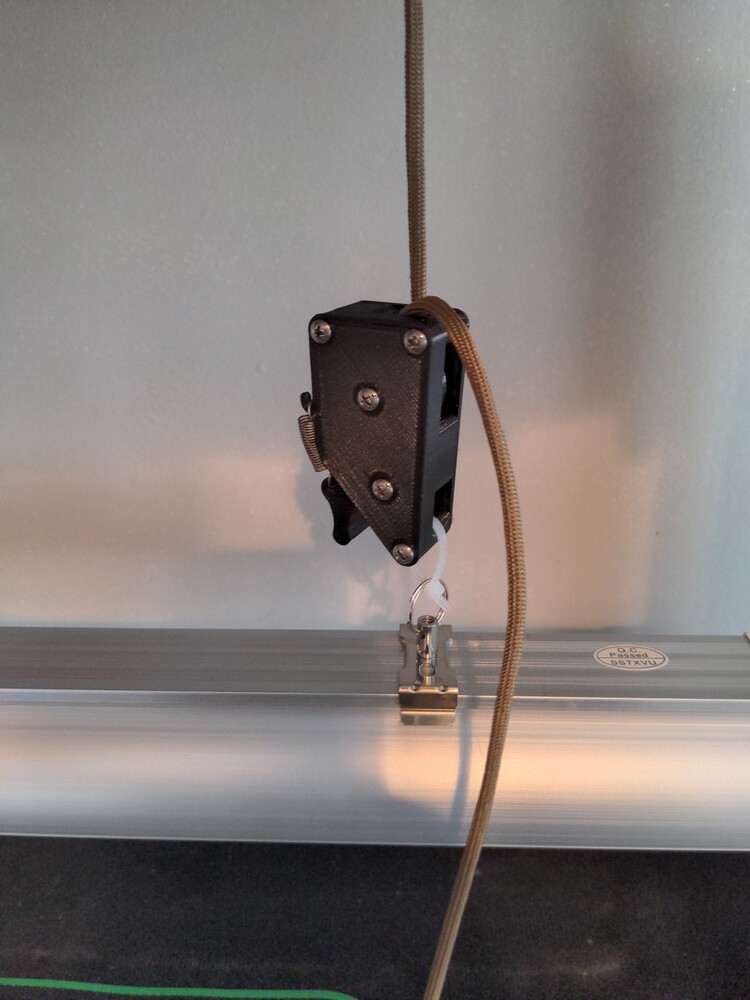
Grow lights need to be down pretty close to the sprouting seeds as they’re coming up. So of course they need to be moved up as the plants grow.

So these little ratcheting things make the perfect height adjustment for my new LED full spectrum lights. 2 shelves are ready, I might put another pair of lights on the bottom shelf.
Speaking of which, it’s spring (at least in this hemisphere)! Would anybody be interested in a gardening/permaculture/agriculture thread here on conversations? A place to share garden tips, plans, successes, experiments, etc.?
1 Like
Certainly! I can share tips on growing cheatgrass, mustardweed, and a wide variety of thistles and tumbleweed-type plants!
1 Like
I would!
You left out your most impressive talent: rock farming!
LOL
I’d enjoy a thread on all that @Canem, although mostly wouldn’t be able to contribute much, or put in to practice much in there. But would be nice to read up on the stuffs.
I just have not had much time for printing beyond production runs. I did have a simple project under the heading of ‘3D printing your problems away’.
I needed a 3/4 to 1/2" conduit knockout adapter washer but I didn’t feel like driving the 45 minutes to Home Depot at 9pm on a Friday night. So I didn’t!

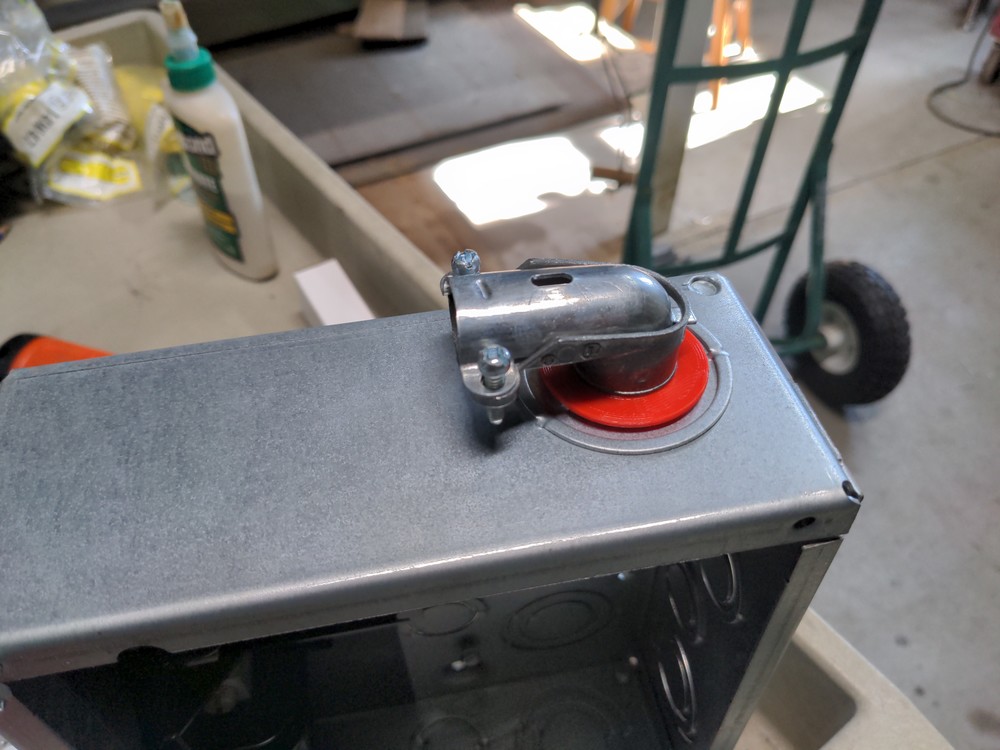
~1 hour to quickly CAD a couple stacked cylinders, clean the bed and print 2 sets. I got to keep plugging away at wiring in the meantime. It was a good night!

I’ve heard that TPU is extremely difficult to work with on a Bowden extruder.
It’s not so bad once you get it dialed in. Make sure your Bowden setup is well adjusted so there’s minimal bends and interference that could cause friction on the TPU, set retractions to a minimum, and mostly just print at a very slow speed. Like 30mm/s tops.
Hmm…well…how about a 1000x1000mm print bed? GIANT 3D PRINTER FROM SCRATCH MkIV - BIGGER! - YouTube Apparently he’s now doing a 1000x1000x1420mm print space BUILDING A GIANT 3D PRINTER (from scratch) PT1. THE FRAME - YouTube
I’ll raise you a much larger one: https://www.sq4d.com ![]()
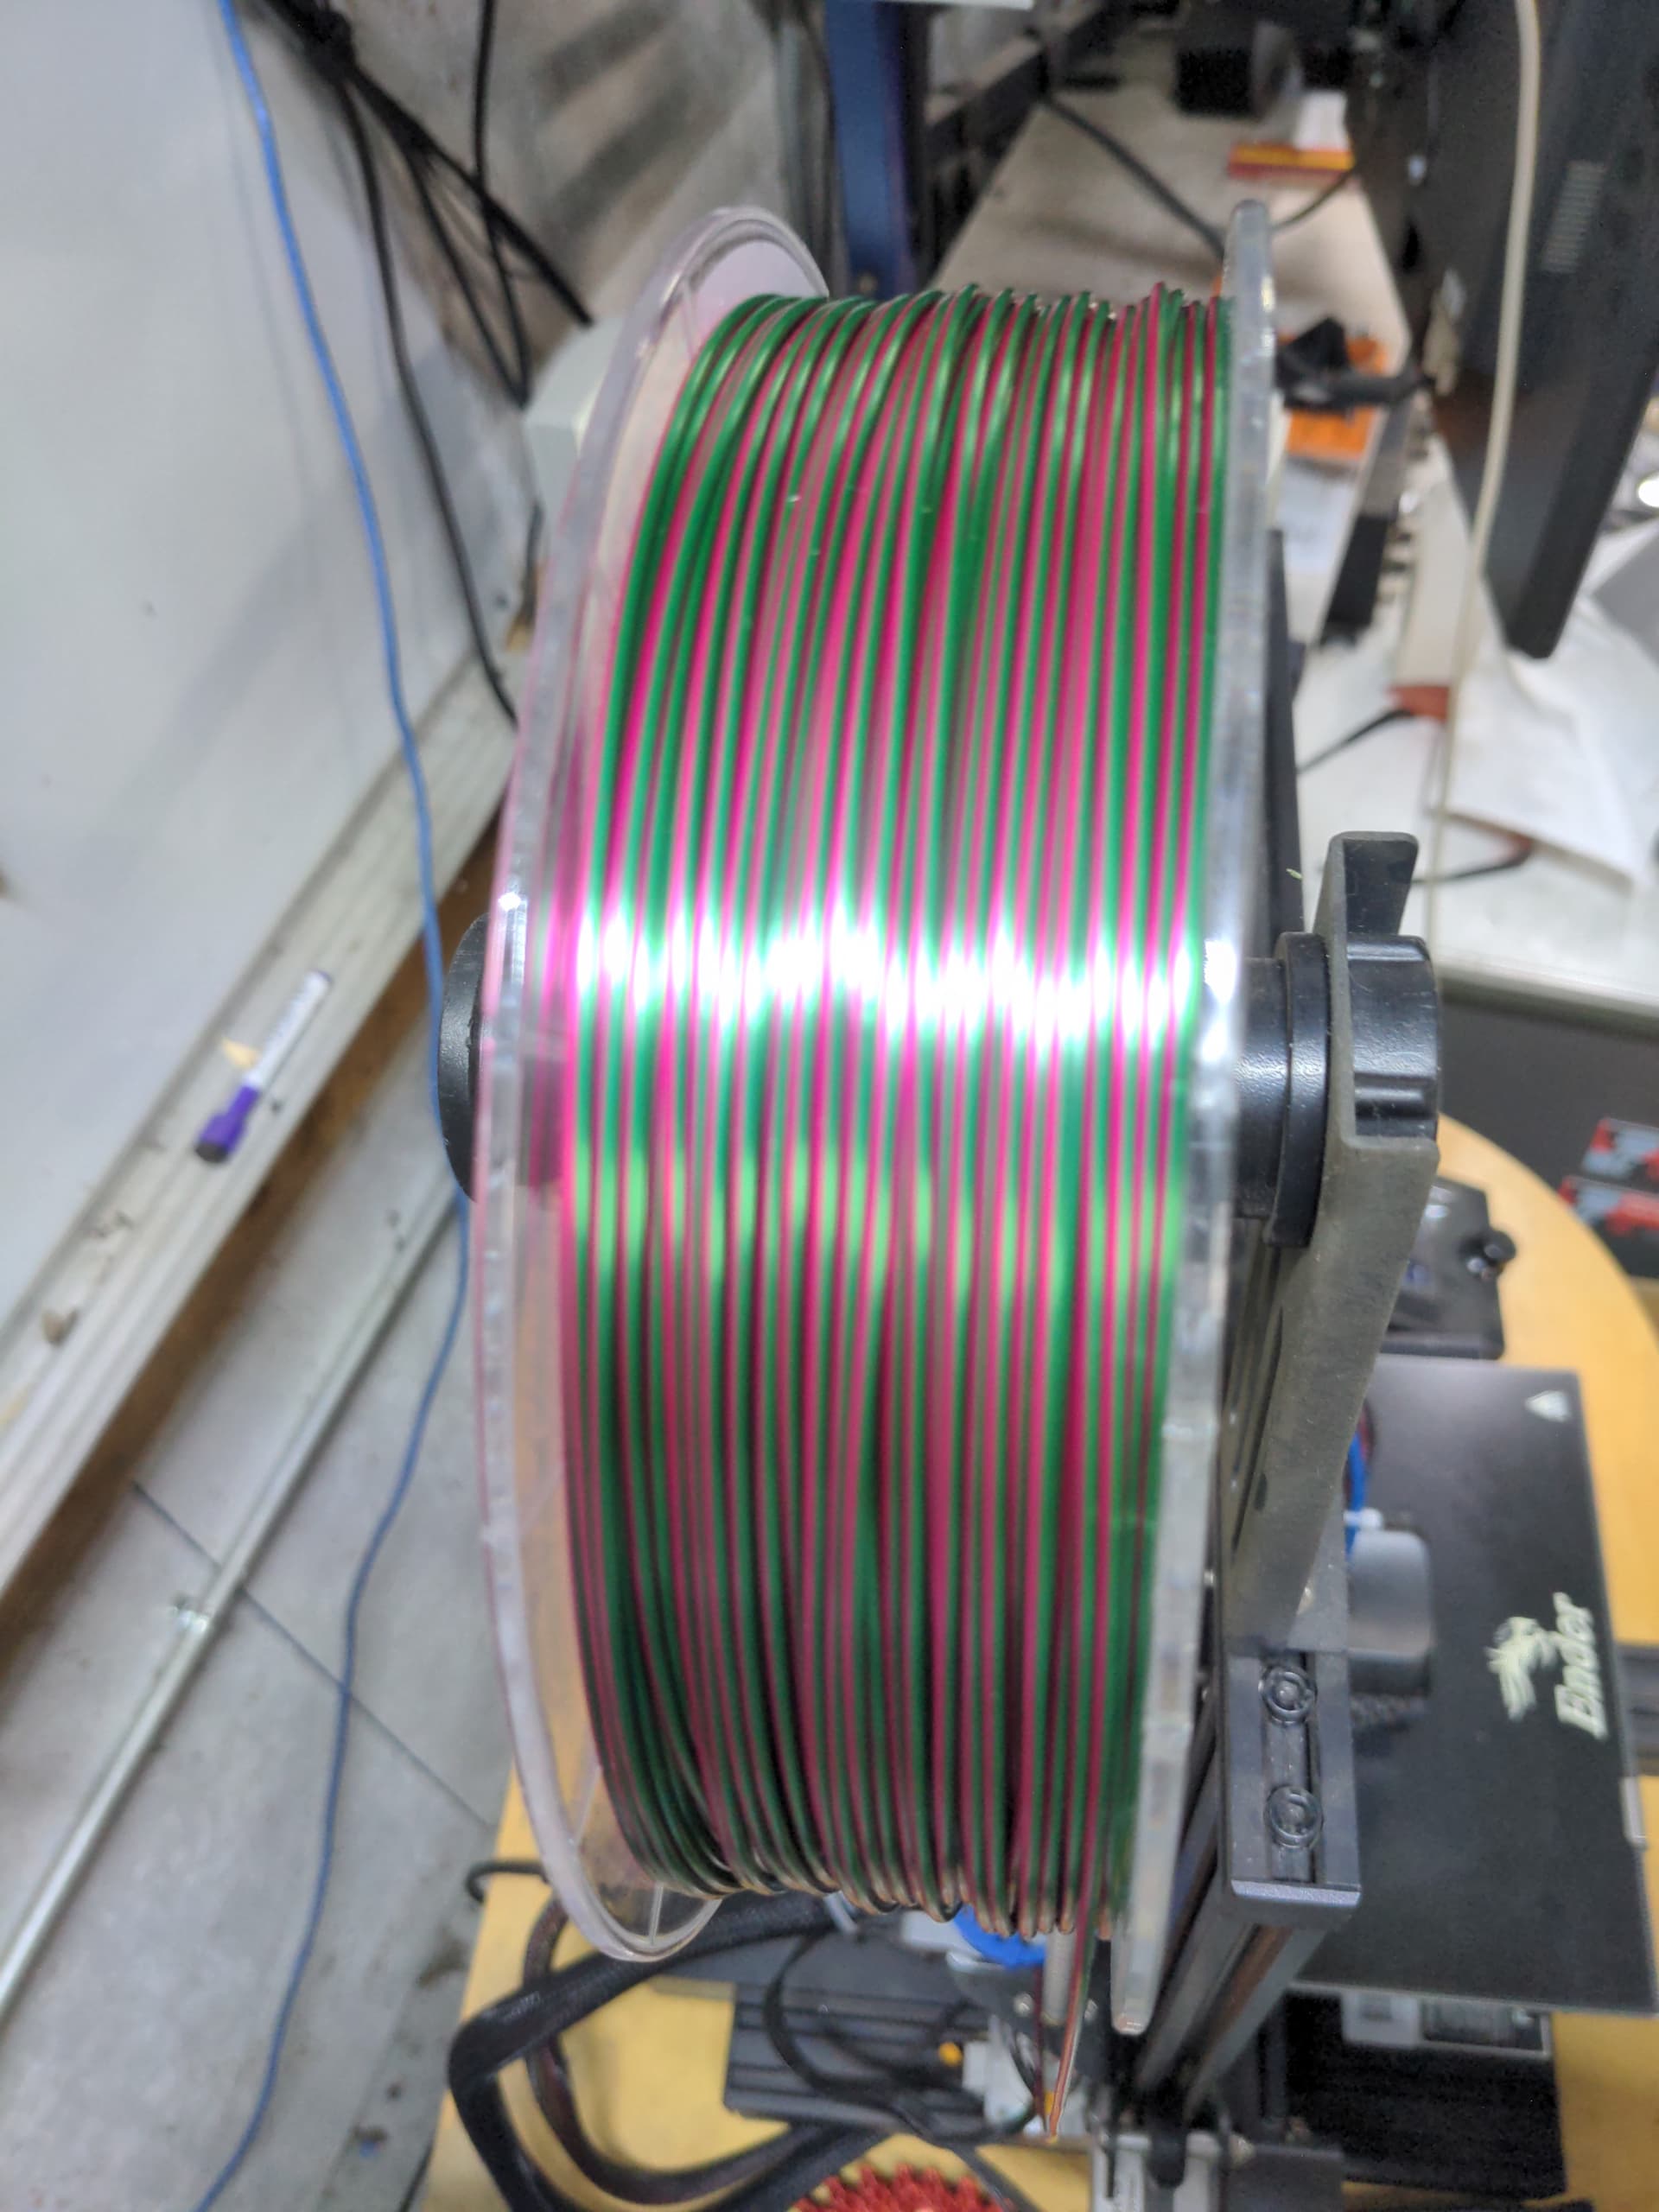
Been working with and dialing in some fancy colored PLA filaments recently. Today I’m trying my first experiments with ‘MatterHackers Quantum PLA’, a dichromatic green/pink metallic filament.
It’s essentially like a 2-color toothpaste- pink and green stuck together making up 1/2 the cross section of the filament.
First step besides getting the stuff to stick and extrude properly is to print a ‘calibration coin’- a model designed to help determine where the ‘split’ is on a given printer and extrusion setup. For such cases where you care where the split between the 2 colors is, this will tell you what angle to orient the model.


On this printer it’s actually pretty darn close to down the centerline.
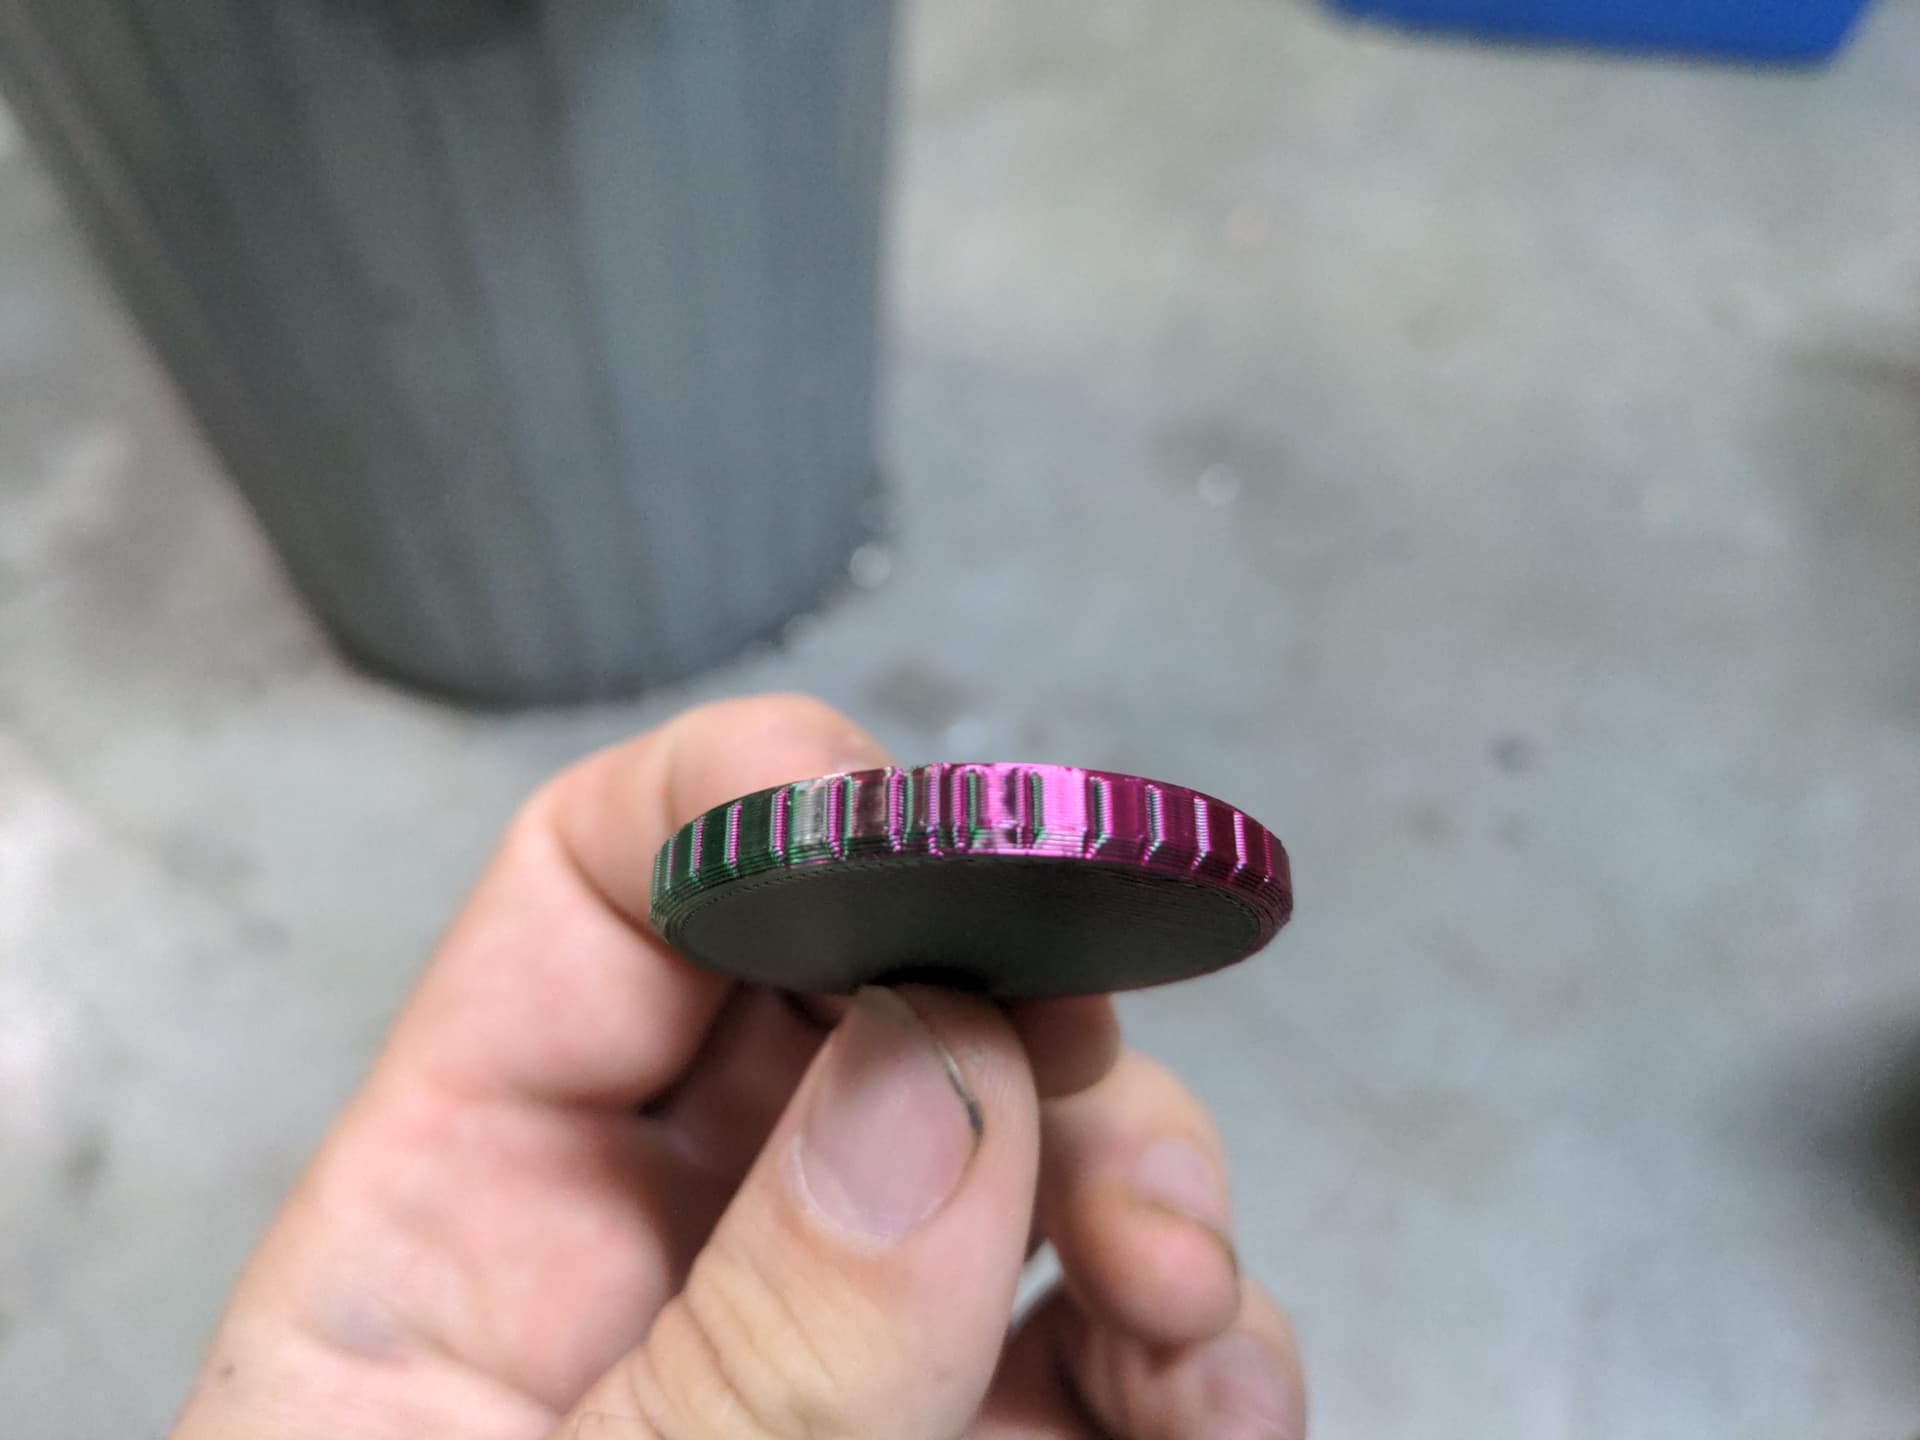
Of course on a curved surface it transitions from one color to the other more gradually, which I think will look super cool.
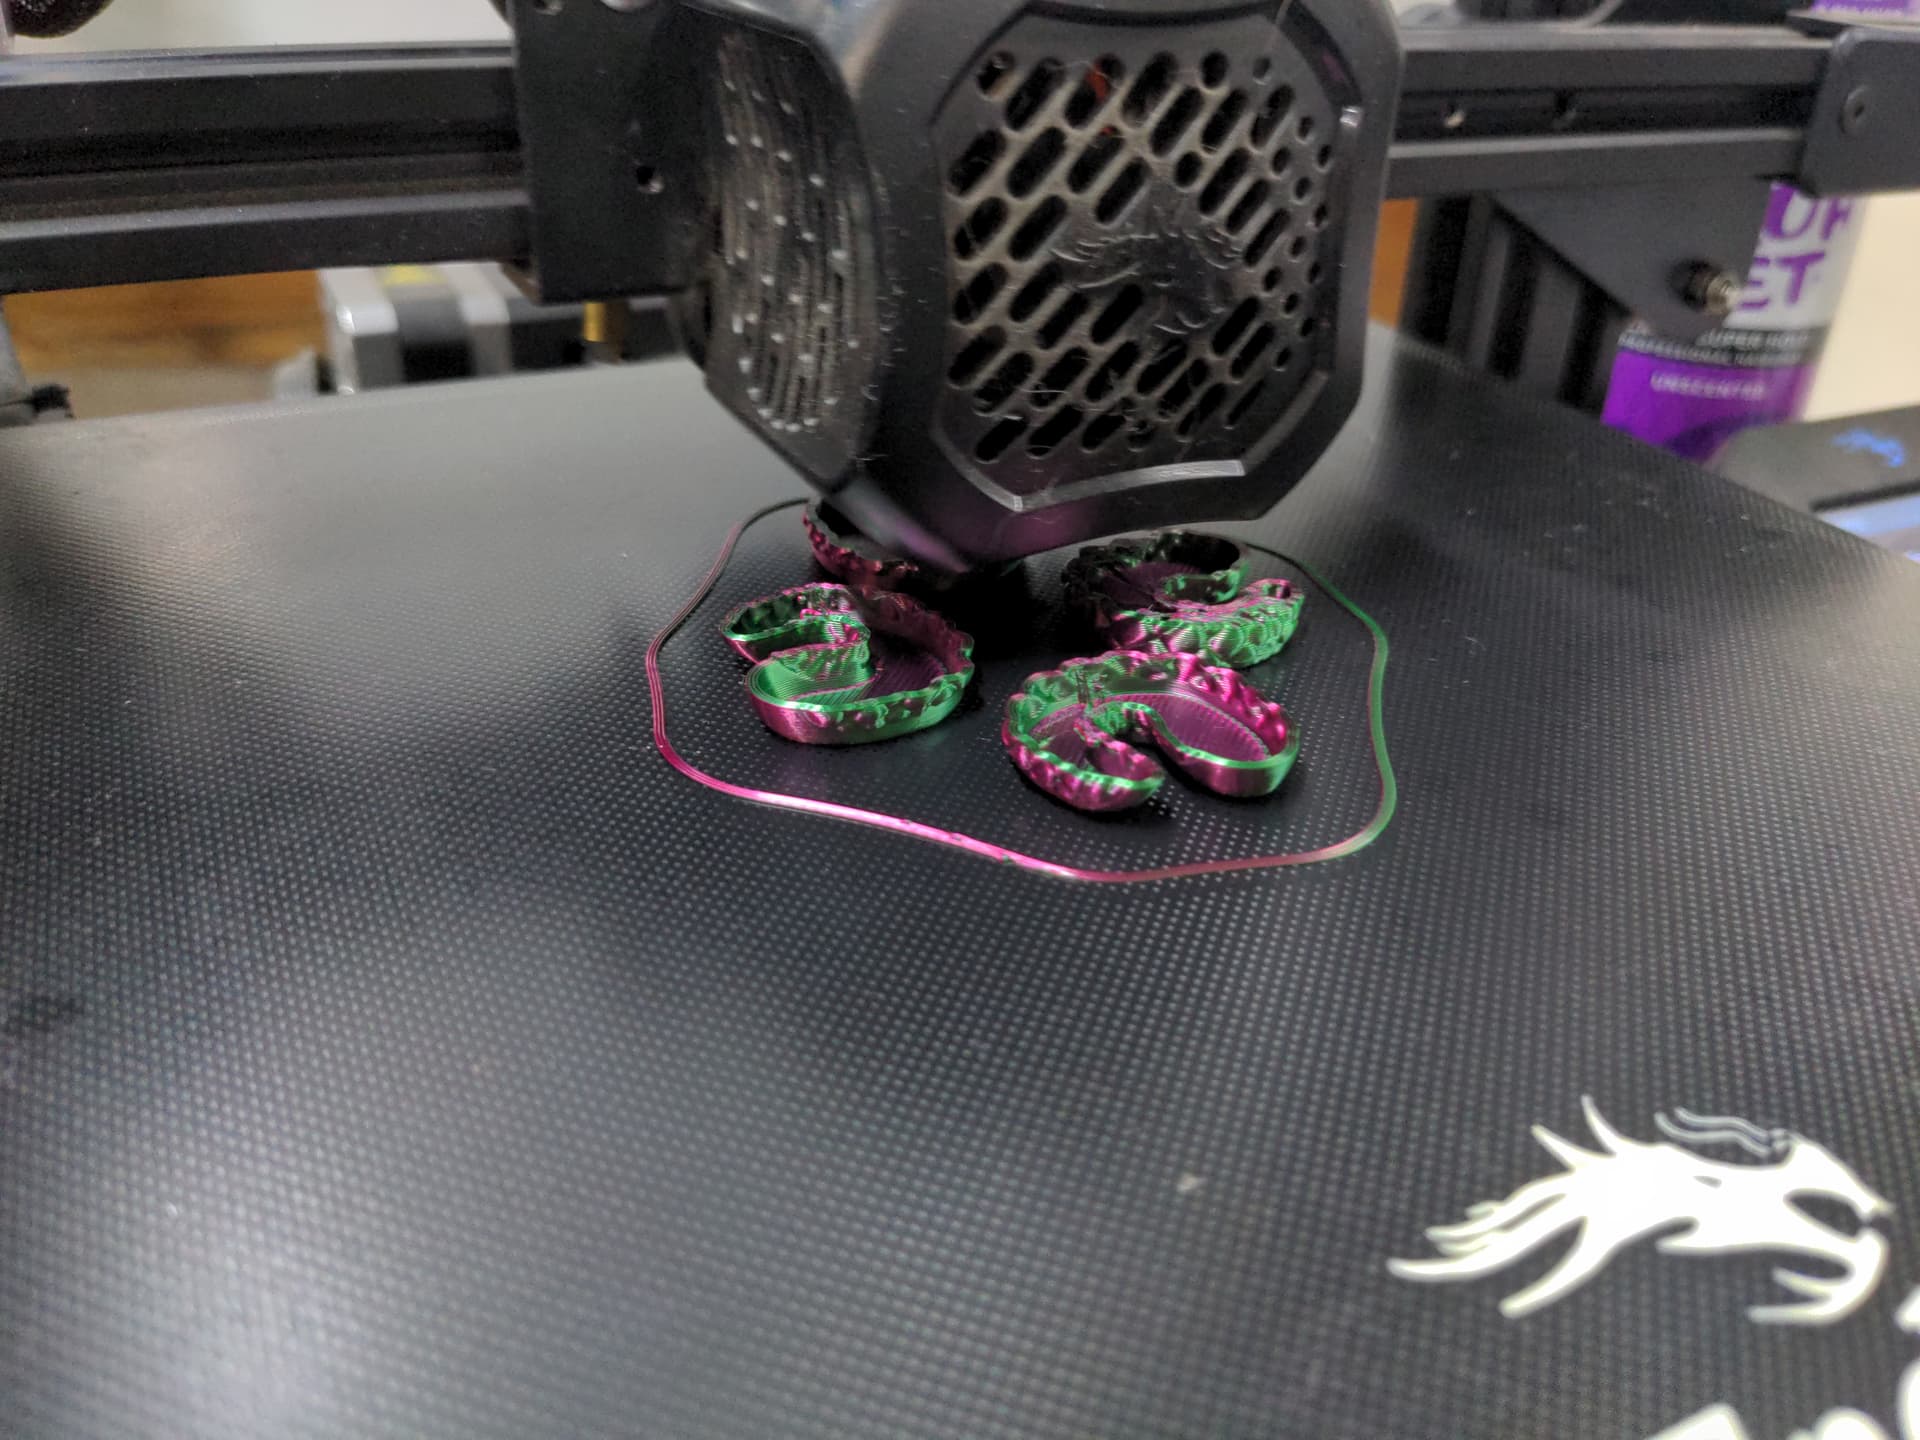
So, now for a more practical test, still in progress:
Also while I work on another filament, trying to get some test-model optimizations done and play with some of Cura’s new features. Today: ‘lightning’ infill. An infill designed to only support the top layers, for such models where interior hollow space doesn’t need support/strength but the roof does.
It increases to set infill percent-density at the top, starting much lower than that from down below. It sure looks weird. Keep an eye on the orange bits that appear in the part interiors: